Intro
Enhance Excel with ActiveX option buttons, learn to add borders for improved visualization, and master user form design with related LSI keywords like Excel VBA, checkbox borders, and button formatting.
The world of Excel is vast and intricate, with numerous tools and features designed to help users create, manage, and analyze data efficiently. Among these tools, ActiveX controls stand out for their ability to enhance the interactive capabilities of Excel worksheets. One such control is the Option Button, which allows users to select from a set of predefined choices. However, users often seek to customize these controls to better fit their worksheet's aesthetic or to draw attention to specific options. One common customization request is adding a border around an ActiveX Option Button in Excel.
In Excel, ActiveX controls, including Option Buttons, can be customized in various ways to improve their functionality and appearance. Customizing the appearance of these controls can make worksheets more user-friendly and visually appealing. When it comes to adding a border to an ActiveX Option Button, users might find that the standard properties provided by Excel do not directly support this customization. This limitation necessitates exploring alternative methods or workarounds to achieve the desired visual effect.
The process of customizing ActiveX controls in Excel involves accessing the control's properties, which can be done through the Visual Basic for Applications (VBA) editor or by using the control's properties window when in design mode. For users looking to add a border to an ActiveX Option Button, understanding how to navigate these tools and interfaces is crucial. Moreover, familiarity with Excel's object model and the properties available for ActiveX controls can help in finding creative solutions to customization challenges.
Understanding ActiveX Controls in Excel
ActiveX controls in Excel are powerful tools that can enhance the functionality and interactivity of worksheets. These controls, including buttons, checkboxes, and option buttons, can be used to create user forms, control workflows, and even interact with other applications. Understanding how to insert, configure, and customize these controls is essential for advanced Excel users and developers. The Option Button, in particular, is useful for presenting users with a set of mutually exclusive choices, making it easier to collect specific types of input.
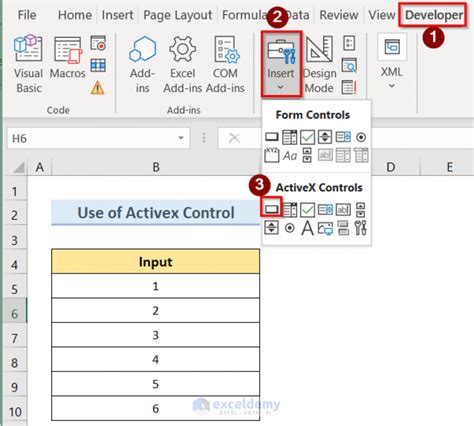
Inserting ActiveX Option Buttons
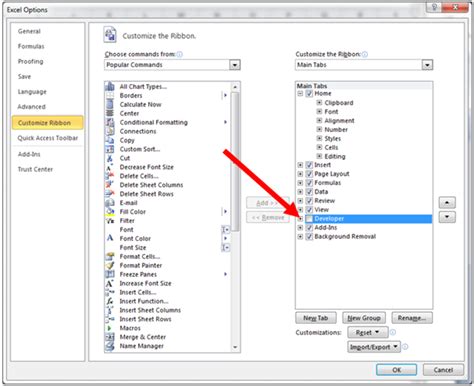
To work with ActiveX Option Buttons, users first need to insert them into their worksheet. This process involves accessing the Developer tab in Excel, which may need to be activated if it's not already visible. Once in the Developer tab, users can click on the "Insert" button under the Controls group and select the Option Button from the ActiveX Controls section. After inserting the Option Button, it can be resized and positioned as needed on the worksheet.Customizing ActiveX Option Buttons

Customizing ActiveX Option Buttons involves changing their properties to fit specific needs or preferences. This can include changing the button's caption, its linked cell, or its appearance. However, adding a border around an ActiveX Option Button is not a straightforward process since this option is not directly available in the control's properties. Users might need to explore alternative methods, such as using the VBA editor to manipulate the control's appearance or combining the Option Button with other Excel elements to create a bordered effect.
Using VBA to Customize ActiveX Controls
The Visual Basic for Applications (VBA) editor provides a powerful interface for customizing and automating tasks in Excel. For ActiveX controls like the Option Button, VBA can be used to change properties that are not accessible through the standard Excel interface. This includes manipulating the control's appearance, such as adding a border, although this might require creative coding to achieve the desired effect. Users familiar with VBA can leverage its capabilities to extend the functionality and customization options of ActiveX controls.Adding a Border to an ActiveX Option Button
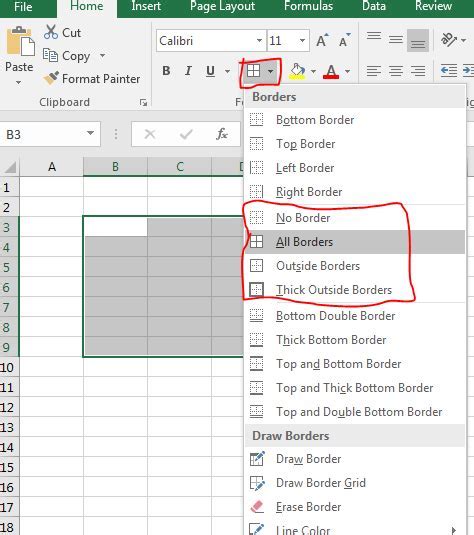
To add a border to an ActiveX Option Button in Excel, users can employ a workaround that involves using Excel's built-in drawing tools. By drawing a rectangle around the Option Button and adjusting its properties, such as fill color and line style, users can create a bordered effect. This method requires precision in sizing and positioning the rectangle to ensure it closely fits around the Option Button, but it provides a viable alternative to directly adding a border to the control itself.
Step-by-Step Guide to Adding a Border
1. **Insert the Option Button**: Go to the Developer tab, click "Insert" under the Controls group, and select the Option Button from the ActiveX Controls. 2. **Draw a Rectangle**: Use the "Shapes" tool in the Insert tab to draw a rectangle that will serve as the border. Position and resize it to fit around the Option Button. 3. **Adjust Rectangle Properties**: Right-click the rectangle, select "Format Shape," and adjust the line style, width, and color to achieve the desired border appearance. 4. **Send the Rectangle to the Back**: Right-click the rectangle and select "Send to Back" to ensure it does not overlap with the Option Button.Conclusion and Future Directions

In conclusion, while directly adding a border to an ActiveX Option Button in Excel might not be possible through standard control properties, users can achieve a similar effect by combining the control with other Excel elements, such as rectangles drawn using the Shapes tool. This approach, along with leveraging VBA for more complex customizations, underscores the versatility and customizability of Excel. As users continue to push the boundaries of what is possible with ActiveX controls and other Excel features, the importance of creative problem-solving and exploring alternative methods becomes increasingly evident.
Gallery of ActiveX Option Button Customizations
ActiveX Option Button Customizations


How do I insert an ActiveX Option Button in Excel?
+To insert an ActiveX Option Button, go to the Developer tab, click "Insert" under the Controls group, and select the Option Button from the ActiveX Controls.
Can I directly add a border to an ActiveX Option Button?
+No, directly adding a border to an ActiveX Option Button is not possible through standard control properties. However, you can achieve a similar effect by drawing a rectangle around the button.
How do I customize the appearance of an ActiveX Option Button using VBA?
+You can customize the appearance of an ActiveX Option Button using VBA by accessing the control's properties through the VBA editor. This allows for more complex customizations beyond what is available through the standard Excel interface.
We invite you to share your experiences and tips on customizing ActiveX Option Buttons in Excel. Have you found innovative ways to add borders or customize the appearance of these controls? Your insights can help others in the Excel community. Feel free to comment below, and don't forget to share this article with anyone who might benefit from learning more about customizing ActiveX controls in Excel.