Intro
Unlock data insights with Analysis By Week And Year Excel, utilizing weekly and yearly data analysis, trend tracking, and financial reporting to drive business growth and informed decision-making.
Analyzing data by week and year in Excel can be a powerful way to track trends, patterns, and changes over time. This type of analysis is particularly useful for businesses, organizations, and individuals who need to make data-driven decisions. In this article, we will delve into the importance of analyzing data by week and year, and provide a step-by-step guide on how to do it in Excel.
The ability to analyze data by week and year is crucial for understanding how different factors, such as seasonality, holidays, and economic changes, impact your data. By examining data on a weekly and yearly basis, you can identify areas of improvement, optimize resources, and make informed decisions. For instance, a retail business may want to analyze sales data by week and year to determine which products are most popular during certain times of the year, and adjust their inventory and marketing strategies accordingly.
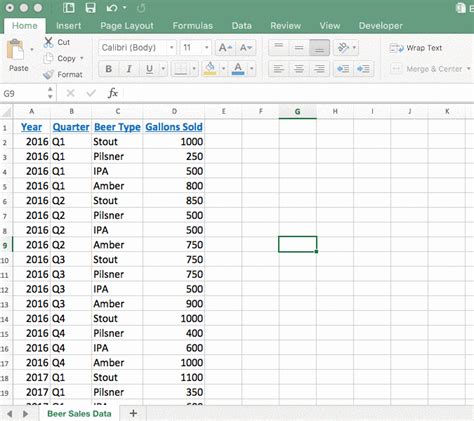
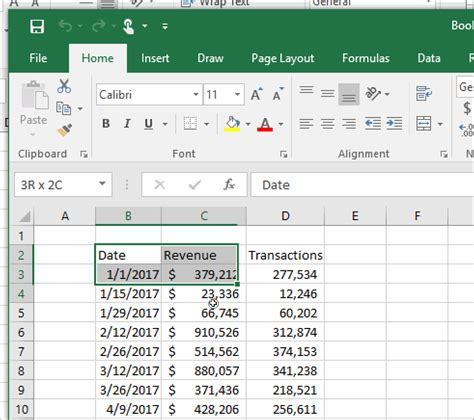
To get started with analyzing data by week and year in Excel, you will need a dataset that includes dates and corresponding values. This dataset can be in the form of a table, pivot table, or even a simple list. The key is to have a clear and organized dataset that can be easily manipulated and analyzed. For example, you may have a dataset that includes sales data for each week of the year, along with the corresponding dates and values.
Preparing Your Data

Before you can start analyzing your data by week and year, you need to prepare it. This involves cleaning, formatting, and organizing your data to make it suitable for analysis. Here are some steps to follow:
- Ensure that your data is in a table format, with each row representing a single observation and each column representing a variable.
- Check for any missing or duplicate values, and remove or fill them as necessary.
- Format your date column to display the week and year. You can do this by using the TEXT function in Excel, which converts a date to a text string in a specified format.
- Use the WEEKDAY and YEAR functions to extract the week and year from your date column. The WEEKDAY function returns the day of the week as a number, while the YEAR function returns the year as a four-digit number.
Using Formulas to Extract Week and Year
You can use formulas to extract the week and year from your date column. Here are some examples: * To extract the week, use the formula: =WEEKNUM(A2), where A2 is the cell containing the date. * To extract the year, use the formula: =YEAR(A2), where A2 is the cell containing the date. * To extract both the week and year, use the formula: =WEEKNUM(A2)&"-"&YEAR(A2), where A2 is the cell containing the date.Creating a Pivot Table
A pivot table is a powerful tool in Excel that allows you to summarize and analyze large datasets. To create a pivot table, follow these steps:
- Select the entire dataset, including headers.
- Go to the Insert tab in the ribbon and click on PivotTable.
- Choose a cell to place the pivot table, and click OK.
- Drag the week and year fields to the Row Labels area.
- Drag the value field to the Values area.
- Use the pivot table to analyze your data by week and year. You can use the filters and slicers to narrow down the data and focus on specific weeks or years.
Customizing Your Pivot Table
You can customize your pivot table to suit your needs. Here are some examples: * Use the Group feature to group the weeks into months or quarters. * Use the Filter feature to filter the data by specific weeks or years. * Use the Slicer feature to create interactive filters that allow you to select specific weeks or years. * Use the Conditional Formatting feature to highlight cells that meet certain conditions, such as values above or below a certain threshold.Visualizing Your Data

Visualizing your data is an important step in analyzing it. Here are some ways to visualize your data by week and year:
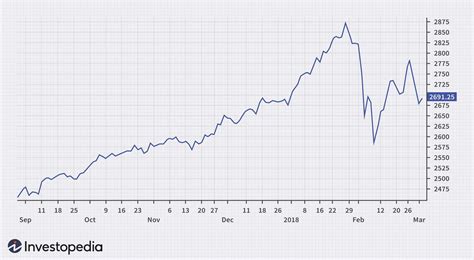
- Use a line chart to show the trend of your data over time.
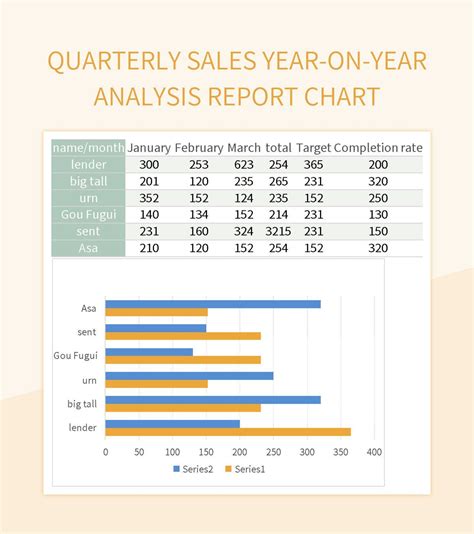
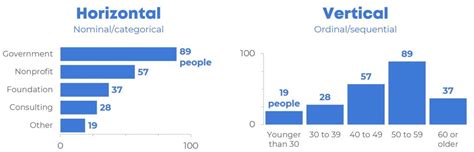
- Use a bar chart to compare the values of different weeks or years.
- Use a heatmap to show the distribution of your data over time.
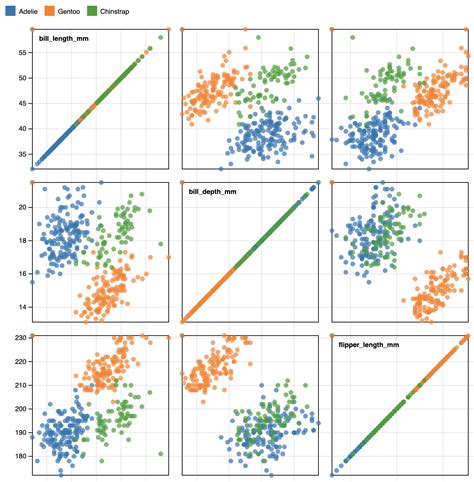
- Use a scatter plot to show the relationship between two variables.
Using Charts to Tell a Story
You can use charts to tell a story with your data. Here are some examples: * Use a chart to show how your data has changed over time. * Use a chart to compare the values of different weeks or years. * Use a chart to highlight trends or patterns in your data. * Use a chart to show the relationship between two variables.Gallery of Analysis By Week And Year Excel
Analysis By Week And Year Excel Image Gallery


What is analysis by week and year in Excel?
+Analysis by week and year in Excel is a process of analyzing data by week and year to track trends, patterns, and changes over time.
How do I prepare my data for analysis by week and year?
+To prepare your data, ensure it is in a table format, clean and format the date column, and use formulas to extract the week and year.
What is a pivot table and how do I use it for analysis by week and year?
+A pivot table is a powerful tool in Excel that allows you to summarize and analyze large datasets. To use it for analysis by week and year, drag the week and year fields to the Row Labels area, and the value field to the Values area.
In conclusion, analyzing data by week and year in Excel is a powerful way to track trends, patterns, and changes over time. By following the steps outlined in this article, you can prepare your data, create a pivot table, and visualize your data to gain valuable insights. Whether you are a business owner, organization, or individual, analyzing data by week and year can help you make informed decisions and drive success. We encourage you to try out these techniques and share your experiences with us. If you have any questions or need further assistance, please don't hesitate to comment below.