Intro
Converting timestamps to dates in Excel is a common task, especially when working with data that has been imported from other sources or when dealing with timestamps in seconds or milliseconds since the epoch (January 1, 1970, 00:00:00). Understanding how to perform this conversion is crucial for data analysis and presentation. Here’s a step-by-step guide on how to convert timestamps to dates in Excel.
First, it's essential to understand the format of your timestamp. Timestamps can be in various formats, such as seconds or milliseconds since the epoch. Excel uses a serial number to represent dates and times, where January 1, 1900, is serial number 1, and each subsequent day increments the serial number by 1.
To begin, let's assume you have a timestamp in seconds since the epoch in cell A1.
Converting Seconds to Date
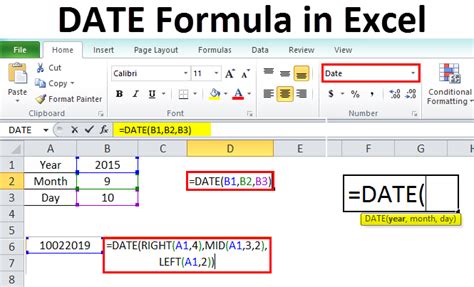
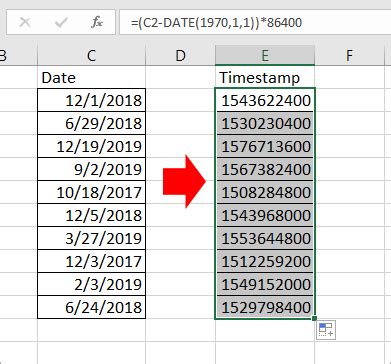
You can convert this timestamp to a date using the following formula:
=(A1/86400)+25569
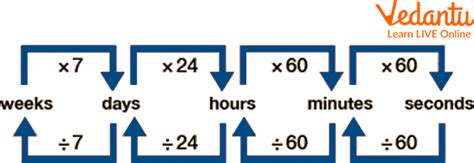
This formula works by dividing the number of seconds by the number of seconds in a day (86400) and then adding the serial number for January 1, 1970 (25569), which is the epoch start date in Excel's date system.
After entering the formula, you might need to format the cell to display the date correctly. To do this, select the cell with the formula, go to the Home tab, click on the Number group, and select "Short Date" or "Long Date" from the dropdown.
Understanding the Formula
The formula `(A1/86400)+25569` is based on the conversion of seconds into days and then adjusting for the epoch. Excel's date system starts from December 30, 1899, but the epoch starts from January 1, 1970. The number 25569 represents the number of days from December 30, 1899, to January 1, 1970, in Excel's serial date numbering.Converting Milliseconds to Date
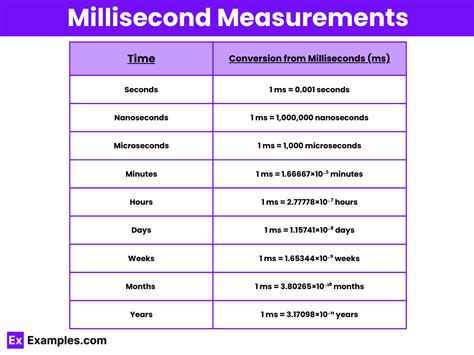
If your timestamp is in milliseconds, you would first convert it to seconds by dividing by 1000, and then apply the same formula:
=(((A1/1000)/86400)+25569)
This formula first converts milliseconds to seconds and then follows the same logic as before to convert seconds to a date.
Formatting the Date
After converting your timestamp to a date, you might want to format it to display the time as well. Select the cell, go to the Home tab, click on the Number group, and select "Custom" from the dropdown. In the "Type" field, you can enter a custom format, such as `yyyy-mm-dd hh:mm:ss` for a format that includes year, month, day, hour, minute, and second.Using VBA for Conversion
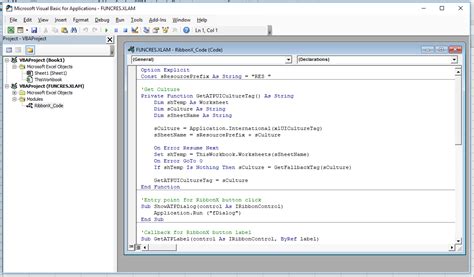
For those comfortable with VBA (Visual Basic for Applications), you can also create a function to convert timestamps. This can be particularly useful if you need to perform this conversion frequently.
To create a VBA function, press Alt + F11 to open the VBA editor, insert a new module, and paste the following code:
Function ConvertToDatePicker(timestamp As Double) As Date
    ConvertToDatePicker = DateAdd("s", timestamp, "1970-01-01")
End Function
You can then use this function in your worksheet like any other formula: =ConvertToDatePicker(A1).
Benefits of VBA
Using VBA can simplify the conversion process, especially when dealing with large datasets or when the conversion needs to be part of a larger workflow. However, it requires familiarity with VBA and the VBA editor.Common Issues and Solutions

- Incorrect Date: Ensure that your timestamp is correctly formatted and that you're using the right formula for seconds or milliseconds.
- #VALUE! Error: This often occurs if the cell containing the timestamp is not correctly referenced in the formula or if the timestamp value is not numeric.
- Date Formatting Issues: After conversion, if the date does not display correctly, check the cell's number formatting and adjust it as necessary.
Troubleshooting Tips
Always verify the input data and the formula for accuracy. If issues persist, try breaking down the formula into parts to identify where the error occurs.Conclusion and Next Steps

Converting timestamps to dates in Excel is a straightforward process once you understand the formulas and techniques involved. Whether you're working with seconds, milliseconds, or any other format, Excel provides the tools you need to efficiently manage and analyze your data. For further learning, consider exploring more advanced date and time functions in Excel, such as handling time zones or performing date arithmetic.
Final Thoughts
Mastering the conversion of timestamps to dates is a fundamental skill for anyone working with data in Excel. By applying the methods outlined in this article, you'll be better equipped to handle a wide range of data analysis tasks and to present your findings in a clear and meaningful way.Timestamp Conversion Image Gallery


How do I convert a timestamp to a date in Excel?
+You can convert a timestamp to a date in Excel by using the formula =(A1/86400)+25569 for seconds, adjusting for milliseconds if necessary, and then formatting the result as a date.
What is the epoch, and why is it used in timestamp conversions?
+The epoch refers to January 1, 1970, 00:00:00 UTC, and it's used as a reference point for timestamps because it's a widely recognized and consistent starting point for measuring time in computing and data analysis.
Can I use VBA to automate timestamp conversions in Excel?
+Yes, you can create a VBA function to convert timestamps to dates in Excel. This can be especially useful for repetitive tasks or when integrating with other VBA scripts.
If you have any questions or need further assistance with converting timestamps to dates in Excel, don't hesitate to ask. Share your experiences or tips for working with timestamps and dates in the comments below. For more information on Excel functions, data analysis, and productivity tips, consider subscribing to our newsletter or following us on social media.