Intro
The ability to copy images to Excel can be a highly useful skill, especially for those who work with data visualization, reporting, or presentation. Excel, being one of the most powerful spreadsheet software, allows users to insert images directly into their worksheets, which can enhance the readability and understandability of the data. However, the process of copying images to Excel might not always be straightforward, especially when dealing with different types of images or sources.
In today's digital age, the importance of being able to effectively communicate data insights cannot be overstated. With the rise of big data and analytics, professionals across various industries are looking for ways to present complex data in a simple, yet engaging manner. Copying images to Excel is just one aspect of this broader trend, as it enables users to add visual elements to their spreadsheets, making them more informative and easier to comprehend.
Whether you are a data analyst, a marketing professional, or a student, being able to copy images to Excel can significantly improve your workflow and productivity. It allows you to add charts, graphs, logos, or any other type of image that can help illustrate your points or make your data more engaging. Moreover, with the increasing use of digital tools and software, the ability to work with images in Excel has become an essential skill for anyone looking to enhance their data presentation skills.
Benefits of Copying Images to Excel

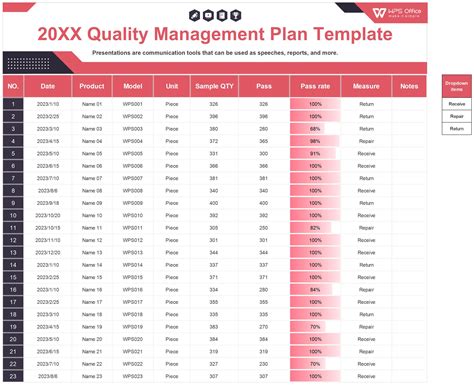
Copying images to Excel offers several benefits, including enhanced data visualization, improved readability, and increased engagement. By adding relevant images to your spreadsheets, you can make complex data more accessible and easier to understand, which is particularly useful when presenting findings to non-technical stakeholders. Furthermore, images can help break up large blocks of text, making your reports or presentations more visually appealing and engaging.
In addition to these benefits, copying images to Excel can also facilitate collaboration and communication among team members. When working on a project that involves data analysis and reporting, being able to share visual elements can help ensure that everyone is on the same page, reducing misunderstandings and miscommunications. Moreover, with the ability to copy images to Excel, users can create customized templates and reports that reflect their brand's identity, which can be particularly important for businesses and organizations.
Types of Images That Can Be Copied to Excel

Excel supports a wide range of image file formats, including JPEG, PNG, GIF, and BMP. This means that users can copy images from various sources, such as websites, documents, or other software applications, and paste them directly into their Excel worksheets. Additionally, Excel allows users to insert screenshots, which can be useful for capturing and sharing visual information from other applications or websites.
When copying images to Excel, it's essential to consider the image resolution and size, as these factors can affect the overall quality and appearance of the image in your spreadsheet. High-resolution images can help ensure that your visuals remain clear and crisp, even when zoomed in or printed. On the other hand, large images can increase the file size of your Excel workbook, which can impact performance and loading times.
Steps to Copy Images to Excel

Copying images to Excel is a relatively straightforward process that involves a few simple steps. Here's a step-by-step guide to help you get started:
- Open your Excel workbook: Start by opening the Excel workbook where you want to copy the image.
- Select the image: Go to the source of the image you want to copy, such as a website, document, or other software application. Select the image by clicking on it or using the keyboard shortcut Ctrl+A (Windows) or Command+A (Mac).
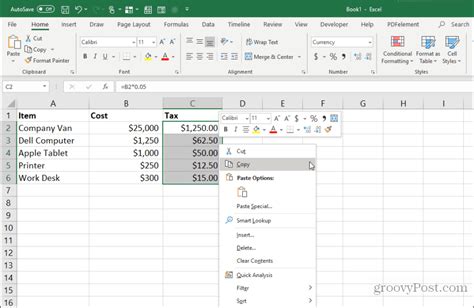
- Copy the image: Right-click on the selected image and choose the "Copy" option, or use the keyboard shortcut Ctrl+C (Windows) or Command+C (Mac).
- Paste the image: Go back to your Excel workbook and select the cell where you want to paste the image. Right-click on the cell and choose the "Paste" option, or use the keyboard shortcut Ctrl+V (Windows) or Command+V (Mac).
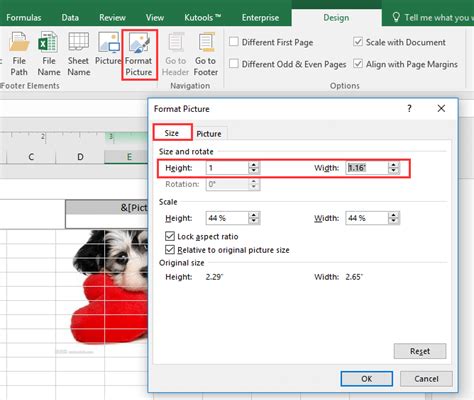
- Adjust the image: Once the image is pasted, you can adjust its size, position, and formatting as needed.
Tips and Tricks for Copying Images to Excel

Here are some additional tips and tricks to help you get the most out of copying images to Excel:
- Use the correct image file format: Make sure to use an image file format that is compatible with Excel, such as JPEG or PNG.
- Optimize image size: Adjust the image size to ensure it fits within your Excel worksheet and doesn't increase the file size too much.
- Use screenshots: Consider using screenshots to capture visual information from other applications or websites.
- Experiment with formatting: Don't be afraid to experiment with different formatting options, such as adjusting the image size, position, and brightness.
Common Issues When Copying Images to Excel

While copying images to Excel is generally a straightforward process, you may encounter some common issues, such as:
- Image not displaying: If the image is not displaying in your Excel worksheet, check that the image file format is compatible with Excel and that the image is not too large.
- Image quality: If the image quality is poor, try adjusting the image resolution or using a different image file format.
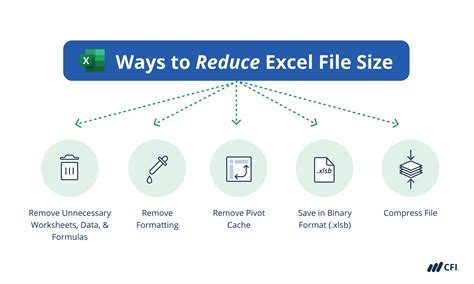
- File size: If the file size of your Excel workbook is too large, consider optimizing the image size or using a different image file format.
Best Practices for Copying Images to Excel

To ensure that you get the most out of copying images to Excel, follow these best practices:
- Use high-quality images: Use high-quality images that are clear and crisp, even when zoomed in or printed.
- Optimize image size: Adjust the image size to ensure it fits within your Excel worksheet and doesn't increase the file size too much.
- Use relevant images: Use images that are relevant to your data and help illustrate your points.
- Experiment with formatting: Don't be afraid to experiment with different formatting options, such as adjusting the image size, position, and brightness.
Copy Image to Excel Gallery


What are the benefits of copying images to Excel?
+The benefits of copying images to Excel include enhanced data visualization, improved readability, and increased engagement. Images can help make complex data more accessible and easier to understand, and can also facilitate collaboration and communication among team members.
What types of images can be copied to Excel?
+Excel supports a wide range of image file formats, including JPEG, PNG, GIF, and BMP. Users can copy images from various sources, such as websites, documents, or other software applications, and paste them directly into their Excel worksheets.
How do I copy an image to Excel?
+To copy an image to Excel, select the image, right-click on it, and choose the "Copy" option. Then, go to your Excel workbook, select the cell where you want to paste the image, right-click on the cell, and choose the "Paste" option.
In conclusion, copying images to Excel is a valuable skill that can enhance your data presentation skills and improve your workflow. By following the steps and tips outlined in this article, you can learn how to copy images to Excel and make the most out of this powerful feature. Whether you're a data analyst, a marketing professional, or a student, being able to copy images to Excel can help you communicate complex data insights in a simple and engaging manner. So why not give it a try and see how copying images to Excel can take your data presentation to the next level? We invite you to share your experiences and tips on copying images to Excel in the comments below, and don't forget to share this article with your friends and colleagues who may benefit from this valuable skill.