Intro
Learn to freeze top 2 rows in Excel, locking headers for easy scrolling and data analysis, using formulas, shortcuts, and Excel functions like Freeze Panes.
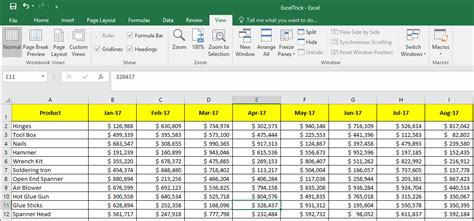
Freezing the top two rows in Excel is a useful feature that allows you to keep important headers or data visible while scrolling through a large dataset. This feature is especially helpful when working with spreadsheets that have multiple rows and columns, making it easier to understand and analyze the data. In this article, we will explore the importance of freezing rows in Excel, the steps to freeze the top two rows, and provide tips and tricks for using this feature effectively.
Freezing rows in Excel is a simple yet powerful tool that can enhance your productivity and efficiency when working with spreadsheets. By keeping the top two rows visible, you can quickly identify the data you are working with and make informed decisions. This feature is also useful when working with multiple sheets or workbooks, as it allows you to easily compare and analyze data.
The ability to freeze rows in Excel is not limited to just the top two rows. You can freeze any number of rows or columns, depending on your specific needs. This feature is also customizable, allowing you to freeze rows or columns in a specific worksheet or across an entire workbook. Whether you are working with a small dataset or a large, complex spreadsheet, freezing rows can help you stay organized and focused.
Why Freeze Rows in Excel?
Freezing rows in Excel is also useful when working with formulas and functions. By keeping the top two rows visible, you can quickly identify the data you are working with and make adjustments as needed. This feature is also useful when working with charts and graphs, as it allows you to easily identify the data being displayed.
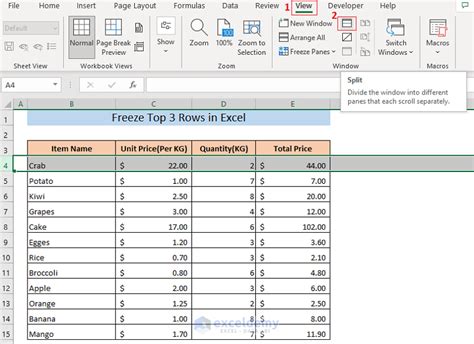
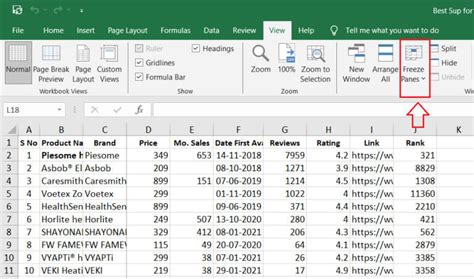
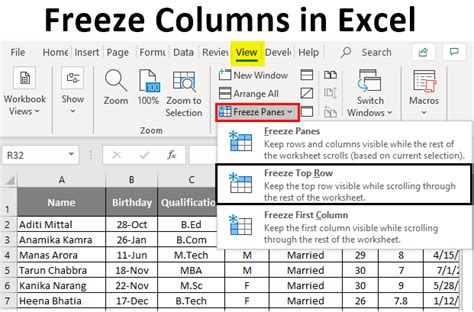
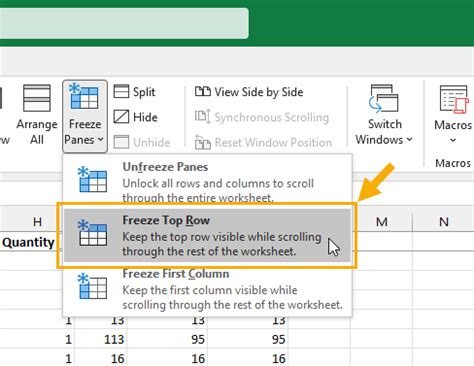
How to Freeze Top 2 Rows in Excel
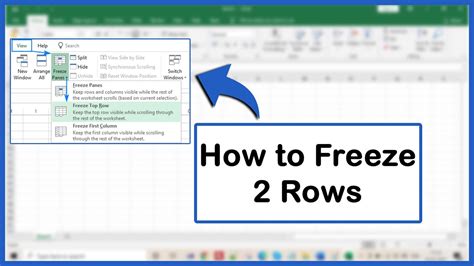
Alternatively, you can also use the keyboard shortcut "Alt + W + F" to freeze the top two rows.
Tips and Tricks for Freezing Rows in Excel
Freezing rows in Excel is a useful feature that can enhance your productivity and efficiency when working with spreadsheets. By keeping the top two rows visible, you can quickly identify the data you are working with and make informed decisions.
Benefits of Freezing Rows in Excel
By freezing rows in Excel, you can take your data analysis to the next level and make informed decisions.
Common Mistakes to Avoid When Freezing Rows in Excel

By avoiding these common mistakes, you can use the freeze rows feature effectively and efficiently.
Freezing Rows in Excel: Best Practices
By following these best practices, you can use the freeze rows feature effectively and efficiently.
Advanced Techniques for Freezing Rows in Excel
By using these advanced techniques, you can take your Excel skills to the next level and become a power user.
Freeze Rows in Excel Image Gallery


How do I freeze rows in Excel?
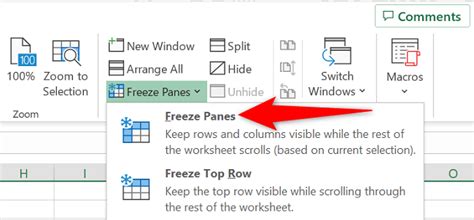
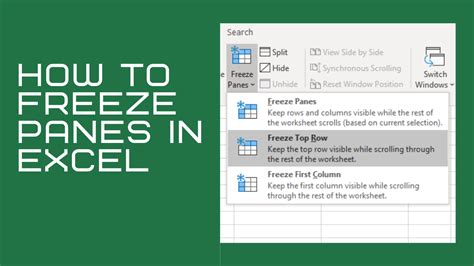
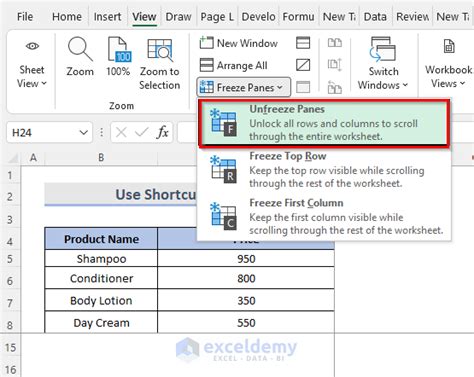
+To freeze rows in Excel, select the cell below the rows you want to freeze, go to the "View" tab, and click on "Freeze Panes". Then, select "Freeze Top Row" or "Freeze Panes" to freeze the top two rows.
How do I unfreeze rows in Excel?
+To unfreeze rows in Excel, go to the "View" tab and click on "Freeze Panes" again. Then, select "Unfreeze Panes" to unfreeze the rows.
Can I freeze rows in a specific worksheet or across an entire workbook?
+Yes, you can freeze rows in a specific worksheet or across an entire workbook. To do this, select the worksheet or workbook you want to freeze rows in, and then follow the steps to freeze rows.
What are the benefits of freezing rows in Excel?
+The benefits of freezing rows in Excel include improved productivity and efficiency when working with large datasets, enhanced data analysis and understanding, and increased organization and focus when working with multiple sheets or workbooks.
Can I use the freeze rows feature with other Excel features, such as filtering and sorting?
+Yes, you can use the freeze rows feature with other Excel features, such as filtering and sorting. This can help you to further analyze and understand your data.
In conclusion, freezing the top two rows in Excel is a useful feature that can enhance your productivity and efficiency when working with spreadsheets. By keeping the top two rows visible, you can quickly identify the data you are working with and make informed decisions. Whether you are working with a small dataset or a large, complex spreadsheet, freezing rows can help you stay organized and focused. We hope this article has provided you with the information you need to get started with freezing rows in Excel. If you have any further questions or would like to learn more about Excel, please don't hesitate to comment or share this article with others.