Intro
The world of Excel formulas can be overwhelming, especially when dealing with dates and months. Understanding how to manipulate and extract information from dates is crucial for data analysis, financial planning, and scheduling. Among the various Excel functions, those related to months are particularly useful for tasks like organizing data by month, calculating elapsed time, and forecasting. In this article, we'll delve into five essential Excel month formulas that can simplify your workflow and enhance your data analysis capabilities.
Excel offers a myriad of functions to work with dates, including those that specifically target months. Whether you're looking to extract the month from a date, calculate the number of months between two dates, or add months to a date, Excel has a formula for it. Mastering these formulas can significantly improve your productivity and the accuracy of your spreadsheets.
Before we dive into the formulas, it's essential to understand the basics of how Excel handles dates. Excel stores dates as serial numbers, starting from January 1, 1900, which is considered day 1. This system makes it easier to perform arithmetic operations on dates. However, it's also important to be aware of the potential pitfalls, such as the difference between the 1900 and 1904 date systems used in Excel.
Understanding Excel Date System
The Excel date system is based on serial numbers, which can be manipulated using various functions and formulas. This unique approach to dates allows for efficient calculations and data analysis. For instance, you can easily calculate the number of days between two dates or add a specified number of months to a given date.
Extracting the Month from a Date

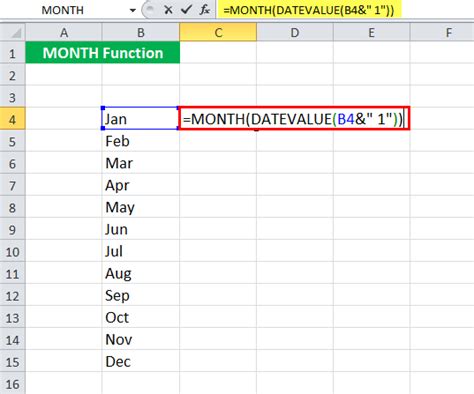
One of the most common tasks when working with dates is extracting the month from a given date. The MONTH function in Excel does exactly this. The formula is straightforward: =MONTH(date), where date is the cell containing the date from which you want to extract the month. For example, if you have a date in cell A1, the formula would be =MONTH(A1). This function returns a number from 1 (January) to 12 (December), representing the month of the year.
Example of Extracting Month
To illustrate, if cell A1 contains the date "02/15/2023", using the formula `=MONTH(A1)` will return `2`, indicating February.Calculating the Number of Months Between Two Dates
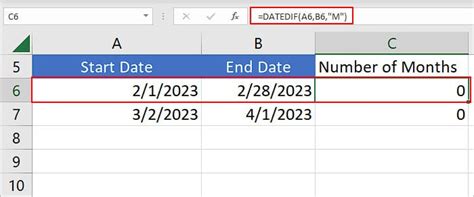
Calculating the number of months between two dates is another common requirement. While Excel doesn't have a built-in function specifically for this, you can use the DATEDIF function, which calculates the difference between two dates in a specified interval. The formula is =DATEDIF(start_date, end_date, "M"), where start_date and end_date are the cells containing the two dates, and "M" specifies that you want the result in months.
Example of Calculating Months Between Dates
For instance, to find the number of months between "01/01/2022" in cell A1 and "06/01/2022" in cell B1, you would use `=DATEDIF(A1, B1, "M")`, which returns `5`.Adding Months to a Date
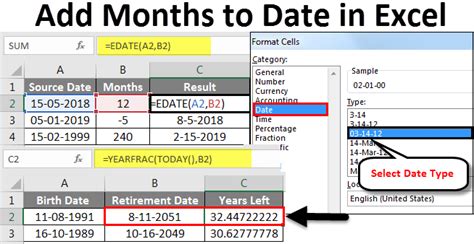
Sometimes, you need to add a certain number of months to a date. The EDATE function is perfect for this task. The formula is =EDATE(start_date, months), where start_date is the initial date and months is the number of months you want to add.
Example of Adding Months
If you want to add 3 months to the date in cell A1 ("02/15/2023"), the formula would be `=EDATE(A1, 3)`, resulting in "05/15/2023".Returning the First Day of the Month

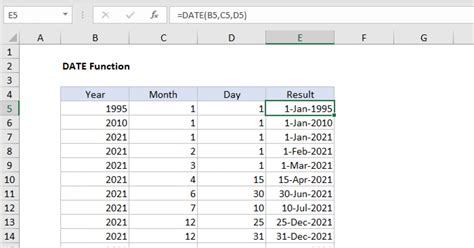
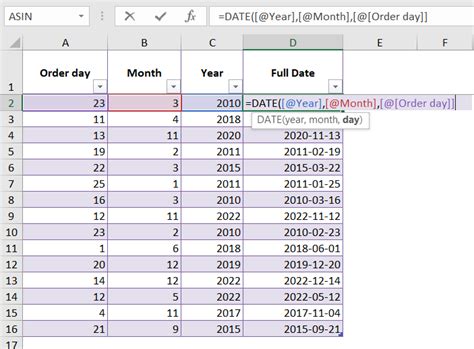
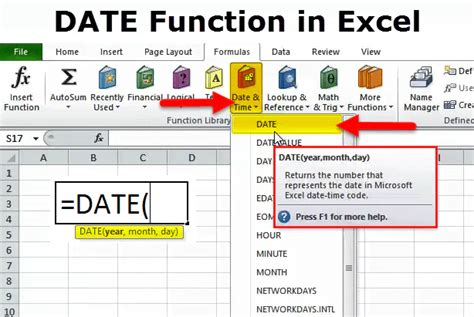
Knowing the first day of the month for a given date can be useful for various calculations and data grouping tasks. The formula to achieve this is =DATE(YEAR(date), MONTH(date), 1), where date is the cell containing the date for which you want to find the first day of the month.
Example of Finding the First Day of the Month
Using the date "02/15/2023" in cell A1, the formula `=DATE(YEAR(A1), MONTH(A1), 1)` returns "02/01/2023", which is the first day of February 2023.Returning the Last Day of the Month

Similarly, finding the last day of the month for a given date is useful, especially for financial and scheduling applications. The formula to find the last day of the month is =DATE(YEAR(date), MONTH(date)+1, 0), where date is the cell containing the date.
Example of Finding the Last Day of the Month
For the date "02/15/2023" in cell A1, using `=DATE(YEAR(A1), MONTH(A1)+1, 0)` returns "02/28/2023" for non-leap years and "02/29/2023" for leap years, giving you the last day of February.Excel Month Formulas Image Gallery


What is the purpose of the MONTH function in Excel?
+The MONTH function is used to extract the month from a given date in Excel.
How do I calculate the number of months between two dates in Excel?
+You can use the DATEDIF function with the "M" interval to calculate the number of months between two dates.
What is the EDATE function used for in Excel?
+The EDATE function is used to add a specified number of months to a date.
In conclusion, mastering Excel month formulas can significantly enhance your ability to work with dates and perform complex data analysis tasks. Whether you're extracting months from dates, calculating the number of months between dates, or adding months to a date, Excel's array of functions provides the tools you need. By understanding and applying these formulas, you can streamline your workflow, improve the accuracy of your spreadsheets, and uncover deeper insights from your data. We invite you to share your experiences with Excel month formulas, ask questions, or explore more advanced topics in data analysis and spreadsheet management.