Intro
Learn to create Excel Pivot Table reports by grouping data easily by month, using date grouping, and filtering techniques to analyze and summarize large datasets efficiently.
Excel Pivot Tables are a powerful tool for data analysis, allowing users to summarize and analyze large datasets with ease. One common task when working with time-based data is to group data by month. This can be particularly useful for identifying trends, patterns, and seasonality in data. In this article, we will explore how to group data by month in an Excel Pivot Table easily, making it simpler to analyze and understand your data.
Grouping data by month in a Pivot Table can help in creating more meaningful summaries and visualizations. For instance, if you have sales data that includes dates, grouping this data by month can help you see how sales fluctuate over time, which months are the strongest, and where improvements might be needed. This kind of analysis is crucial for businesses, financial analysts, and anyone dealing with time-series data.
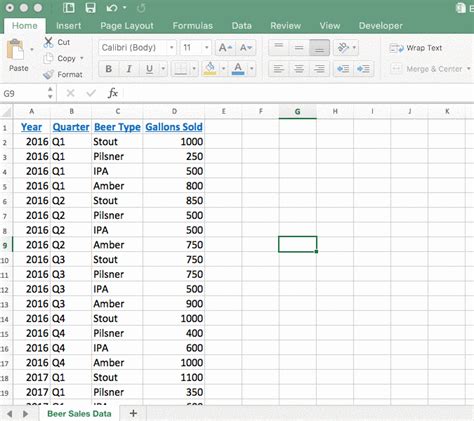
To begin, you need to have your data organized in a table format, with one column dedicated to the dates you wish to group by month. The exact steps to group by month can vary slightly depending on the version of Excel you are using, but the general process remains the same.
Preparing Your Data

Before creating a Pivot Table, ensure your data is well-organized. This includes having a header row with clear and concise column names and ensuring that your date column is in a format that Excel recognizes as a date. This preparation is crucial for the Pivot Table to function correctly and for you to be able to group your data by month efficiently.
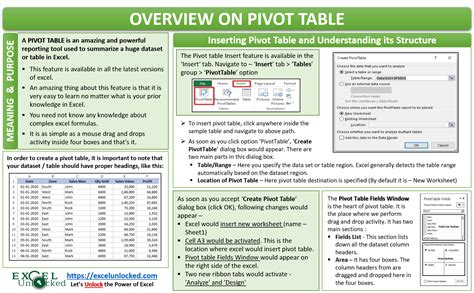
Creating a Pivot Table
To create a Pivot Table, select any cell within your data range, go to the "Insert" tab on the ribbon, and click on "PivotTable." Choose a location for your Pivot Table and select "OK." Excel will then create a blank Pivot Table, ready for you to start analyzing your data.
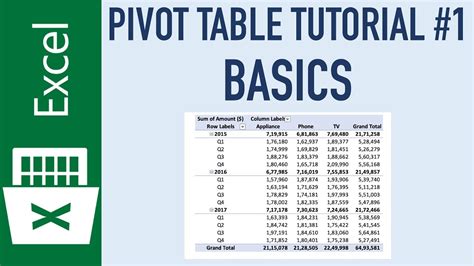
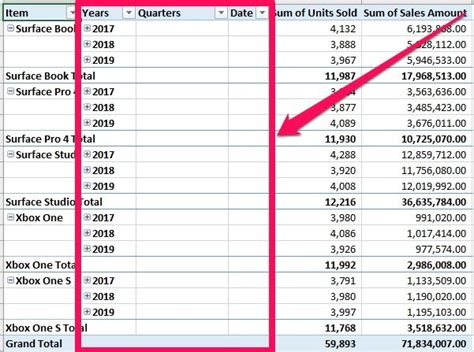
Grouping Data by Month

To group your data by month, follow these steps:
- Drag your date field to the "Row Labels" area of the Pivot Table.
- Right-click on one of the dates in the Pivot Table and select "Group."
- In the "Grouping" dialog box, select "Months" and choose the specific grouping you want (e.g., months, quarters, years).
- Click "OK" to apply the grouping.
Alternatively, if you're using a newer version of Excel, you might see a "Group by" option directly when you right-click on the date field in the Pivot Table, making the process even more straightforward.
Benefits of Grouping by Month
Grouping data by month offers several benefits, including: - **Simplified Analysis:** It simplifies the analysis of large datasets by condensing the data into more manageable chunks. - **Trend Identification:** It helps in identifying trends and patterns over time, which can be crucial for forecasting and planning. - **Improved Visualization:** Grouped data can be more effectively visualized, making it easier to understand and communicate insights to others.Common Challenges and Solutions

When working with Pivot Tables and grouping data by month, you might encounter a few challenges. For instance, if your date field is not recognized as a date, you might not be able to group it by month. To solve this, ensure your dates are in a correct date format and consider using the "Text to Columns" feature to convert your date column into a proper date format.
Another challenge could be dealing with missing or duplicate dates. For missing dates, you might need to decide whether to include them in your analysis or not. For duplicates, you can use Excel's built-in functions to remove duplicates or adjust your Pivot Table settings to handle them appropriately.
Best Practices for Working with Pivot Tables
- **Keep Your Data Organized:** Always ensure your data is well-organized and easy to understand. - **Use Meaningful Field Names:** Use clear and descriptive names for your fields to make your Pivot Table easier to navigate. - **Experiment with Different Groupings:** Don't be afraid to try different groupings to see what works best for your data and analysis needs.Advanced Pivot Table Techniques
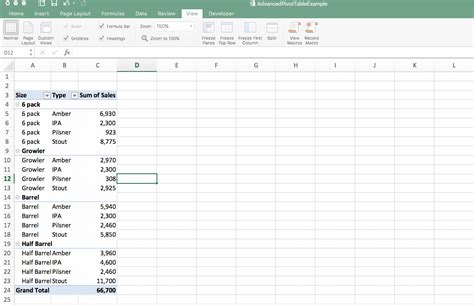
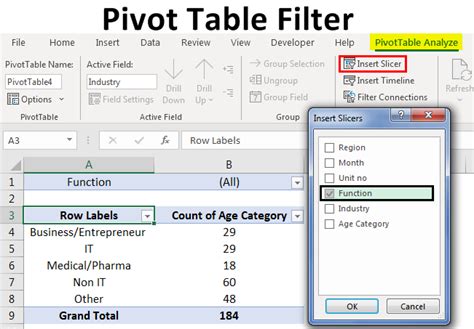
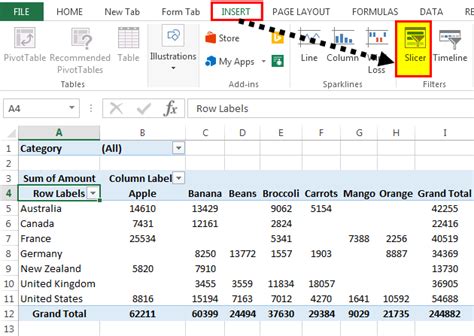
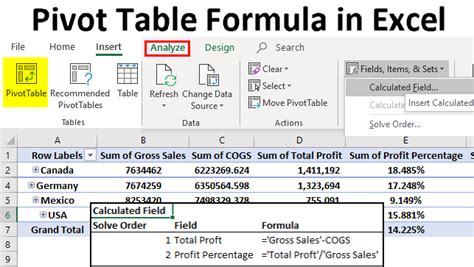
Once you're comfortable grouping data by month, you can explore more advanced Pivot Table techniques. This includes using slicers to filter your data, creating calculated fields to perform more complex analyses, and using Power Pivot for even more advanced data modeling and analysis.
Using Slicers for Filtering
Slicers are a powerful tool in Excel that allow you to filter your Pivot Table data easily. By adding a slicer to your Pivot Table, you can quickly switch between different views of your data, making it easier to analyze and compare different time periods or categories.Conclusion and Next Steps

Grouping data by month in an Excel Pivot Table is a fundamental skill for anyone looking to analyze time-series data effectively. By following the steps and tips outlined in this article, you should be able to create powerful Pivot Tables that help you understand your data better. Remember to keep practicing and exploring the advanced features of Pivot Tables to become more proficient in data analysis.
Pivot Table Image Gallery


How do I create a Pivot Table in Excel?
+To create a Pivot Table, select any cell within your data range, go to the "Insert" tab, and click on "PivotTable." Choose a location for your Pivot Table and select "OK."
Why can't I group my date field by month?
+Ensure your date field is in a correct date format. If not, use the "Text to Columns" feature to convert it into a proper date format.
How do I remove duplicates from my Pivot Table data?
+You can use Excel's built-in "Remove Duplicates" feature or adjust your Pivot Table settings to handle duplicates appropriately.
We hope this comprehensive guide has helped you understand how to group data by month in an Excel Pivot Table easily. Whether you're a beginner or an advanced user, mastering Pivot Tables can significantly enhance your data analysis capabilities. Feel free to share your experiences, ask questions, or provide feedback in the comments below. Don't forget to share this article with anyone who might benefit from learning more about Excel Pivot Tables and data analysis.