Intro
Copying visible cells in Excel VBA is a common task, especially when working with filtered data or hidden rows and columns. The importance of this topic lies in its ability to streamline data manipulation and analysis by allowing users to work only with the data that is relevant to their current needs. Whether you're a data analyst, a financial professional, or an Excel power user, mastering the skill of copying visible cells can significantly enhance your productivity and efficiency in handling data.
The process of copying visible cells involves understanding how Excel VBA interacts with the Excel application, specifically in terms of selecting and manipulating ranges of cells. Excel VBA provides a robust set of tools and methods for accomplishing this task, including the use of the SpecialCells method, which can be used to select only the visible cells within a specified range. This method is particularly useful because it allows you to avoid the tedious and error-prone process of manually selecting cells, especially in large datasets.
In the context of Excel VBA, understanding the benefits and working mechanisms of copying visible cells is crucial. One of the primary benefits is the ability to work with filtered lists efficiently. When you filter a list in Excel, only the rows that meet the filter criteria are displayed, but the hidden rows are still part of the dataset. By using VBA to copy only the visible cells, you can easily extract the filtered data for further analysis or reporting without having to manually select each visible row.
Introduction to Copying Visible Cells
To get started with copying visible cells in Excel VBA, it's essential to understand the basic syntax and methods involved. The Range.SpecialCells method is a key component, as it allows you to specify that you want to work with only the visible cells. This method can be used in conjunction with other VBA commands to select, copy, and paste the visible cells to a new location within the workbook.
Basic Syntax and Examples
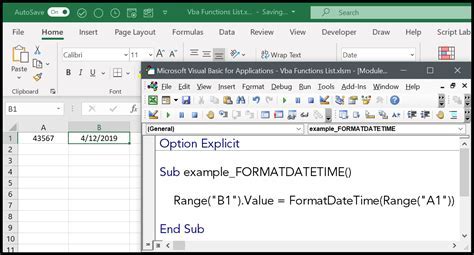
The basic syntax for selecting visible cells using the `SpecialCells` method is as follows: ```vba Range("A1:A10").SpecialCells(xlCellTypeVisible).Select ``` This example selects only the visible cells within the range A1:A10. You can then use the `Copy` method to copy these selected cells: ```vba Range("A1:A10").SpecialCells(xlCellTypeVisible).Copy ``` After copying the visible cells, you can paste them to a new location using the `Paste` method: ```vba Range("B1").Paste ``` These basic examples illustrate how to select, copy, and paste visible cells using Excel VBA. However, in real-world scenarios, you often need to work with more complex datasets and perform additional tasks, such as looping through multiple ranges or handling errors that might occur during the copying process.Working with Filtered Data

One of the most common scenarios where copying visible cells is useful is when working with filtered data. Excel's filtering capabilities allow you to quickly narrow down large datasets to only the rows that meet specific criteria. However, when you want to work with this filtered data in VBA, you need to ensure that your code only considers the visible rows.
To copy filtered data, you can use a similar approach to the one described above, but you need to make sure that the range you are working with is correctly defined and that the filter is applied before attempting to copy the visible cells.
Here is an example of how to copy filtered data:
Sub CopyFilteredData()
    Dim sourceRange As Range
    Dim targetRange As Range

    ' Define the source and target ranges
    Set sourceRange = Range("A1:A10")
    Set targetRange = Range("B1")

    ' Apply a filter to the source range (example: filter column A to show only values greater than 10)
    sourceRange.AutoFilter Field:=1, Criteria1:=">10"

    ' Copy the visible cells
    sourceRange.SpecialCells(xlCellTypeVisible).Copy

    ' Paste the copied cells to the target range
    targetRange.Paste
End Sub
This example demonstrates how to apply a filter to a range, copy the visible cells, and then paste them to a new location. The key steps involve defining the source and target ranges, applying the filter, selecting and copying the visible cells, and finally pasting them to the target location.
Handling Errors and Edge Cases
When working with VBA, especially when automating tasks that involve user interaction like copying and pasting, it's crucial to consider potential errors and edge cases. For instance, what if the user hasn't selected a range, or what if the filter doesn't return any visible rows? Handling these scenarios properly can make your VBA code more robust and user-friendly.To handle errors, you can use VBA's built-in error handling mechanisms, such as On Error Resume Next or On Error GoTo ErrorHandler. These statements allow you to specify what actions should be taken if an error occurs during the execution of your code.
For edge cases, such as when no visible cells are found after applying a filter, you can add conditional checks to ensure that your code behaves as expected. For example, you might want to check if any cells are visible before attempting to copy them:
If sourceRange.SpecialCells(xlCellTypeVisible).Count > 0 Then
    ' Copy the visible cells
    sourceRange.SpecialCells(xlCellTypeVisible).Copy
Else
    MsgBox "No visible cells found.", vbInformation
End If
This approach prevents potential errors and provides a better user experience by informing the user if no data is available for copying.
Best Practices and Tips

When working with Excel VBA to copy visible cells, there are several best practices and tips to keep in mind:
- Always define your ranges explicitly: Avoid using
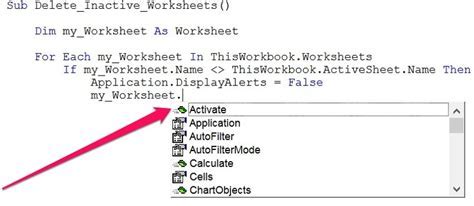
SelectandActiveCellwhenever possible, as these can lead to unpredictable behavior. Instead, define your ranges usingRangeorCells. - Use meaningful variable names: Naming your variables clearly can make your code easier to understand and maintain.
- Test your code thoroughly: Before deploying your VBA code, test it with various datasets and scenarios to ensure it behaves as expected.
- Consider performance: When working with large datasets, some VBA operations can be slow. Consider optimizing your code for performance, such as by reducing the number of times you interact with the Excel application.
By following these best practices and tips, you can write more efficient, reliable, and maintainable VBA code for copying visible cells in Excel.
Conclusion and Next Steps
Copying visible cells in Excel VBA is a powerful technique that can greatly enhance your data manipulation and analysis capabilities. By mastering this skill, you can automate tasks, improve your productivity, and make more informed decisions with your data. Whether you're working with filtered lists, hidden rows, or complex datasets, understanding how to copy visible cells can open up new possibilities for what you can achieve with Excel VBA.To further develop your skills, consider exploring more advanced VBA topics, such as working with arrays, using loops to process data, and creating custom user interfaces. These skills will allow you to tackle even more complex data challenges and create sophisticated Excel applications tailored to your specific needs.
Excel VBA Gallery

What is the purpose of copying visible cells in Excel VBA?
+The purpose of copying visible cells is to work with filtered or hidden data efficiently, allowing for the extraction and manipulation of only the relevant data.
How do I copy visible cells using Excel VBA?
+You can copy visible cells by using the `SpecialCells` method with the `xlCellTypeVisible` argument, followed by the `Copy` method.
What are some common applications of copying visible cells in Excel VBA?
+Common applications include working with filtered data, automating reports, and data analysis tasks where only specific data needs to be considered.
We hope this comprehensive guide to copying visible cells in Excel VBA has been informative and helpful. If you have any further questions or need additional assistance, don't hesitate to ask. Share your experiences and tips for working with Excel VBA in the comments below, and consider sharing this article with others who might benefit from learning about this powerful feature in Excel.