Intro
Learn how to delete unnecessary rows in Excel using filters, sorting, and formulas, optimizing your spreadsheet with data cleaning techniques and row management tools.
Managing data in Excel can be a daunting task, especially when dealing with large spreadsheets. One common challenge many users face is deleting unnecessary rows that clutter their data and make it harder to analyze. Whether you're working with a small dataset or a massive one, learning how to efficiently remove unwanted rows is a crucial skill. In this article, we will delve into the various methods of deleting unnecessary rows in Excel, exploring both manual and automated techniques to help you streamline your data management process.
Deleting unnecessary rows is not just about cleaning up your spreadsheet; it's also about ensuring the integrity and accuracy of your data. Incorrect or redundant data can lead to incorrect analysis and decision-making. Therefore, understanding the different methods to remove such data is essential for anyone working with Excel, from beginners to advanced users.
The importance of cleaning up your data cannot be overstated. It improves the performance of your Excel application, reduces the file size, and most importantly, enhances the reliability of your data analysis. Before we dive into the how-to, it's essential to understand the context in which deleting rows becomes necessary. This could be during data import, where sometimes extra rows are added, or during data manipulation, where certain conditions might render some rows irrelevant.
Understanding Excel's Interface for Row Deletion
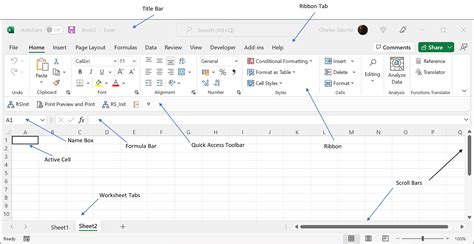
To begin with, let's familiarize ourselves with Excel's interface, particularly the parts that will be useful for our task. The ribbon at the top of the Excel window provides various tabs, each containing groups of related commands. For deleting rows, the "Home" tab is particularly useful, as it contains the "Delete" button within the "Cells" group. Furthermore, understanding how to select rows, either individually or in bulk, is crucial. You can select a row by clicking on the row number on the left side of the Excel window.
Manually Deleting Rows
Manually deleting rows is straightforward and suitable for small datasets or when precision is key. To manually delete a row, follow these steps: - Select the row you wish to delete by clicking on the row number. - Go to the "Home" tab on the ribbon. - In the "Cells" group, click on the "Delete" button. - From the dropdown menu, select "Delete Sheet Rows."Using Filters to Delete Rows

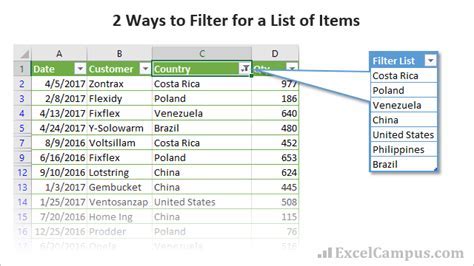
For larger datasets, manual deletion can be tedious and time-consuming. This is where filters come into play. Filters allow you to narrow down your data based on specific conditions, making it easier to identify and delete unnecessary rows. Here’s how to use filters for row deletion:
- Select your data range.
- Go to the "Data" tab on the ribbon.
- Click on the "Filter" button in the "Data Tools" group.
- Once filters are applied, you can use the dropdown arrows in the header row to select specific conditions for each column.
- After filtering your data to show only the rows you wish to delete, select those rows.
- Use the method described earlier to delete the selected rows.
Automating Row Deletion with Macros
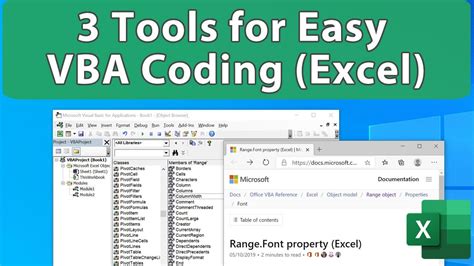
For repetitive tasks or very large datasets, automating the process with macros can save a significant amount of time. Macros are small programs that can be recorded or written to perform a series of actions. To record a macro for deleting rows based on a condition: - Go to the "Developer" tab (you might need to activate this tab via Excel settings). - Click on the "Record Macro" button. - Perform the actions you want to automate, such as filtering and deleting rows. - Stop the recording. - You can then run this macro on your dataset to automate the row deletion process.Using Conditional Formatting and Formulas

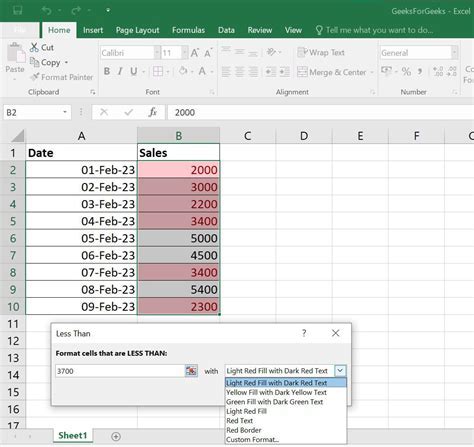
Conditional formatting and formulas can also be used to identify and delete rows. For example, you can use the IF function to check for a condition and return a value that indicates whether a row should be deleted. Conditional formatting can highlight rows based on conditions, making them easier to identify and select for deletion.
Best Practices for Deleting Rows
- Always make a backup of your original data before making significant changes. - Use filters to narrow down your data before deletion to avoid accidentally deleting important rows. - Consider using Excel's "Undo" feature to quickly revert changes if you realize you've made a mistake.Advanced Techniques for Row Management

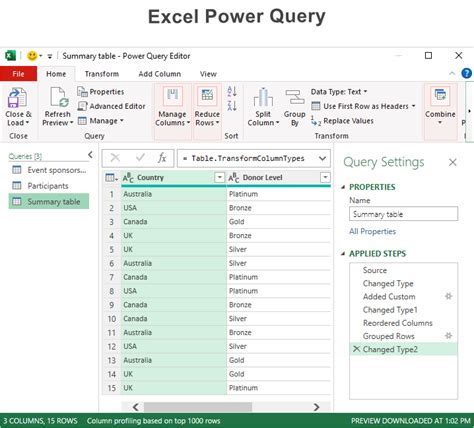
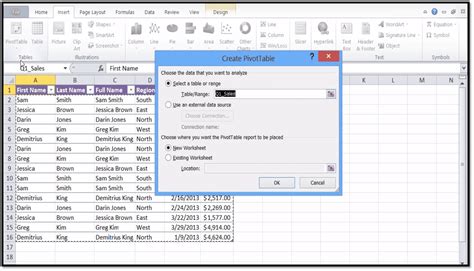
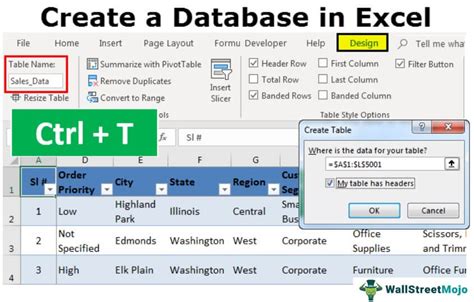
For more complex data management tasks, Excel offers advanced techniques such as using pivot tables, power query, and VBA scripting. These tools can help in more sophisticated data analysis and manipulation, including the automated deletion of rows based on complex conditions.
Common Challenges and Solutions
One common challenge is accidentally deleting important data. To mitigate this, always work on a copy of your data and use Excel's built-in features like "Undo" and version history. Another challenge is dealing with large datasets that are slow to manipulate. Using 64-bit versions of Excel, upgrading your computer's RAM, and optimizing your macros can help improve performance.Gallery of Excel Row Deletion Techniques
Excel Row Deletion Techniques


How do I select multiple rows in Excel for deletion?
+To select multiple rows, hold down the Ctrl key while clicking on the row numbers of the rows you wish to select. For contiguous rows, you can click on the first row, hold down the Shift key, and then click on the last row you want to select.
Can I undo a row deletion in Excel?
+Yes, Excel allows you to undo most actions, including row deletions. Simply press Ctrl+Z on your keyboard immediately after deleting the row. You can also use the "Undo" button in the "Quick Access Toolbar" at the top of the Excel window.
How do I delete rows based on a condition in Excel?
+You can use filters to narrow down your data and then delete the rows that match your condition. Alternatively, you can use macros or formulas to automate the process, especially for large datasets or complex conditions.
In conclusion, managing and deleting unnecessary rows in Excel is a critical skill for anyone working with data. Whether you're manually selecting rows, using filters, or automating the process with macros, understanding the best practices and techniques can significantly enhance your productivity and the accuracy of your data analysis. By applying the methods outlined in this article, you'll be well on your way to becoming proficient in Excel data management. Remember, practice makes perfect, so don't hesitate to experiment with different techniques on sample datasets to find what works best for you. Feel free to share your experiences or ask questions in the comments below, and don't forget to share this article with anyone who might benefit from learning how to delete unnecessary rows in Excel efficiently.