Intro
Discover 5 ways to create stunning Excel Mac graphs, enhancing data visualization with charts, spreadsheets, and pivot tables for effective analysis and presentation.
The importance of data visualization cannot be overstated, especially in today's fast-paced business environment. With the help of Excel Mac graphs, users can create informative and engaging charts to communicate complex data insights effectively. Whether you're a student, a professional, or an entrepreneur, learning how to create Excel Mac graphs can take your data analysis to the next level. In this article, we'll explore five ways to create Excel Mac graphs, along with tips and tricks to help you get the most out of this powerful tool.
Excel Mac graphs offer a wide range of benefits, from enhancing data comprehension to facilitating decision-making. By presenting data in a visual format, graphs can help identify trends, patterns, and correlations that might be difficult to discern from raw data alone. Moreover, Excel Mac graphs can be customized to suit various needs and preferences, making them an indispensable tool for anyone working with data. With the increasing demand for data-driven insights, it's essential to learn how to create effective Excel Mac graphs that convey meaningful information.
In recent years, the use of Excel Mac graphs has become more prevalent, particularly in the business and academic worlds. As data becomes more complex and abundant, the need for effective data visualization tools has grown exponentially. Excel Mac graphs have risen to the challenge, offering a user-friendly interface and a wide range of features to create high-quality charts. Whether you're looking to create a simple bar chart or a complex dashboard, Excel Mac graphs provide the flexibility and functionality to meet your needs. With the right skills and knowledge, you can unlock the full potential of Excel Mac graphs and take your data analysis to new heights.
Understanding Excel Mac Graph Basics

Before diving into the five ways to create Excel Mac graphs, it's essential to understand the basics of graph creation in Excel. This includes selecting the right data range, choosing the correct graph type, and customizing the graph's appearance. Excel Mac offers a variety of graph types, including column, line, pie, and scatter charts, each with its unique characteristics and uses. By understanding the strengths and weaknesses of each graph type, you can create effective visualizations that communicate your data insights clearly.
Choosing the Right Graph Type
When it comes to creating Excel Mac graphs, choosing the right graph type is crucial. Different graph types are suited for different types of data and analysis. For example, column charts are ideal for comparing categorical data, while line charts are better suited for showing trends over time. By selecting the right graph type, you can ensure that your data is presented in a clear and meaningful way.5 Ways to Create Excel Mac Graphs
Now that we've covered the basics, let's explore five ways to create Excel Mac graphs. These methods include:
- Using the "Insert" tab to create a graph
- Using the "Recommended Charts" feature
- Creating a graph from a table
- Using the "PivotChart" feature
- Creating a custom graph using the "Combo" chart type
Each of these methods offers a unique approach to creating Excel Mac graphs, and by mastering them, you can create a wide range of visualizations to suit your needs.
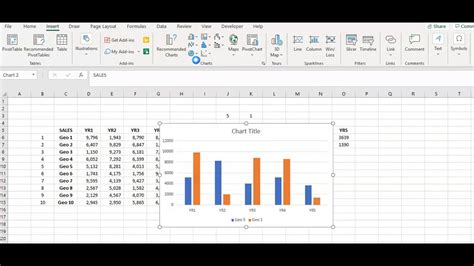
Method 1: Using the "Insert" Tab
The first method involves using the "Insert" tab to create a graph. This is the most straightforward way to create a graph in Excel Mac. Simply select the data range you want to graph, go to the "Insert" tab, and click on the graph type you want to create. Excel will automatically generate a graph based on your selection.Method 2: Using the "Recommended Charts" Feature
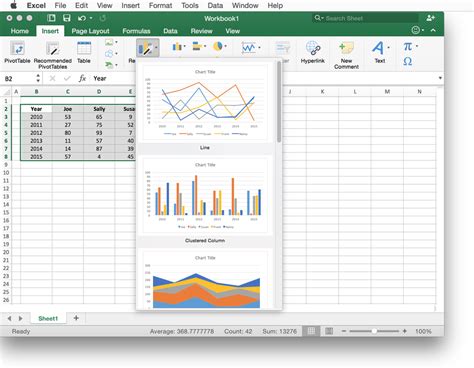
The second method involves using the "Recommended Charts" feature. This feature allows Excel to suggest the best graph type based on your data. To access this feature, select the data range you want to graph, go to the "Insert" tab, and click on the "Recommended Charts" button. Excel will then display a range of graph options, along with a preview of what each graph will look like.Method 3: Creating a Graph from a Table
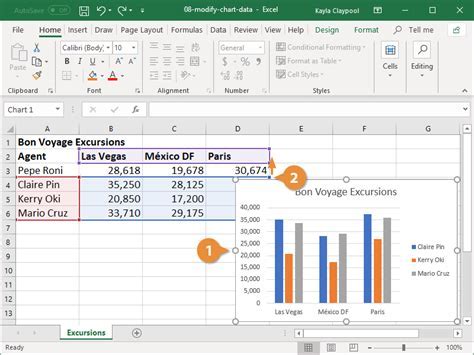
The third method involves creating a graph from a table. This is a great way to create a graph when you have a large dataset. To create a graph from a table, select the table, go to the "Insert" tab, and click on the graph type you want to create. Excel will automatically generate a graph based on the data in the table.Method 4: Using the "PivotChart" Feature
The fourth method involves using the "PivotChart" feature. This feature allows you to create a graph based on a PivotTable. To create a PivotChart, select the PivotTable, go to the "Insert" tab, and click on the "PivotChart" button. Excel will then display a range of graph options, along with a preview of what each graph will look like.Method 5: Creating a Custom Graph using the "Combo" Chart Type
The fifth method involves creating a custom graph using the "Combo" chart type. This feature allows you to combine different graph types to create a unique visualization. To create a custom graph, select the data range you want to graph, go to the "Insert" tab, and click on the "Combo" chart type. Excel will then display a range of options, allowing you to customize the graph to suit your needs.Customizing Your Excel Mac Graph

Once you've created your Excel Mac graph, you can customize it to suit your needs. This includes changing the graph title, adding axis labels, and modifying the graph's appearance. Excel Mac offers a wide range of customization options, allowing you to create a graph that is both informative and visually appealing.
Adding Axis Labels and Titles
Adding axis labels and titles is an essential part of customizing your Excel Mac graph. This helps to provide context and clarity to the graph, making it easier to understand. To add axis labels and titles, select the graph, go to the "Chart Design" tab, and click on the "Add Chart Element" button. Excel will then display a range of options, allowing you to add axis labels and titles.Modifying the Graph's Appearance
Modifying the graph's appearance is another way to customize your Excel Mac graph. This includes changing the graph's color scheme, adding patterns and textures, and modifying the graph's layout. Excel Mac offers a wide range of options, allowing you to create a graph that is both informative and visually appealing.Advanced Excel Mac Graph Techniques

Once you've mastered the basics of Excel Mac graph creation, you can move on to more advanced techniques. This includes creating interactive graphs, using macros to automate graph creation, and creating custom graph templates. These advanced techniques can help take your graph creation to the next level, allowing you to create complex and informative visualizations.
Creating Interactive Graphs
Creating interactive graphs is a great way to engage your audience and provide a more immersive experience. This can be achieved by using Excel's built-in interactive features, such as hover-over text and drill-down capabilities. To create an interactive graph, select the graph, go to the "Chart Design" tab, and click on the "Add Chart Element" button. Excel will then display a range of options, allowing you to add interactive features.Using Macros to Automate Graph Creation
Using macros to automate graph creation is another advanced technique. This involves recording a macro that automates the graph creation process, allowing you to create multiple graphs quickly and efficiently. To record a macro, go to the "Developer" tab, click on the "Record Macro" button, and follow the prompts.Creating Custom Graph Templates
Creating custom graph templates is a great way to save time and ensure consistency in your graph creation. This involves creating a template that can be used to create multiple graphs, each with the same layout and design. To create a custom graph template, select the graph, go to the "Chart Design" tab, and click on the "Save as Template" button. Excel will then save the graph as a template, allowing you to use it to create future graphs.Excel Mac Graph Image Gallery


What is the best way to create an Excel Mac graph?
+The best way to create an Excel Mac graph depends on your specific needs and preferences. However, using the "Insert" tab to create a graph is a good starting point.
How do I customize my Excel Mac graph?
+To customize your Excel Mac graph, select the graph, go to the "Chart Design" tab, and click on the "Add Chart Element" button. This will display a range of options, allowing you to add axis labels, titles, and modify the graph's appearance.
What are some advanced Excel Mac graph techniques?
+Some advanced Excel Mac graph techniques include creating interactive graphs, using macros to automate graph creation, and creating custom graph templates. These techniques can help take your graph creation to the next level, allowing you to create complex and informative visualizations.
In conclusion, creating Excel Mac graphs is a powerful way to communicate complex data insights effectively. By mastering the five ways to create Excel Mac graphs, customizing your graph, and using advanced techniques, you can take your data analysis to the next level. Whether you're a student, a professional, or an entrepreneur, learning how to create Excel Mac graphs can help you make informed decisions and drive business success. So why not get started today and discover the power of Excel Mac graphs for yourself? Share your experiences and tips in the comments below, and don't forget to share this article with your friends and colleagues who may benefit from learning about Excel Mac graphs.