Intro
Discover 5 ways to use a retro pay calculator in Excel, streamlining payroll processing with back pay, salary adjustments, and compensation calculations, using formulas and templates for accurate retroactive payments.
Retro pay, short for retroactive pay, is a payment made to an employee for work already performed, but for which the employee was not fully compensated at the time. This can occur due to a variety of reasons such as a change in pay rates, a promotion, or the correction of a payroll error. Calculating retro pay can be complex, especially when dealing with multiple pay periods, different pay rates, and varying hours worked. To simplify this process, many use Excel, a powerful spreadsheet program that allows for the creation of custom calculators. Here are five ways to create a retro pay calculator in Excel:
When considering the creation of a retro pay calculator, it's essential to understand the basics of how Excel works. Excel is a grid of rows and columns that can hold numbers, text, and formulas. Formulas are equations that perform calculations on values in other cells. For those familiar with basic arithmetic operations and the concept of variables, Excel can be a straightforward tool to learn.
Creating a retro pay calculator involves several steps, including setting up the spreadsheet layout, defining the variables, and writing the formulas to calculate the retro pay. The layout should include sections for inputting the employee's original pay rate, the new pay rate, the pay periods affected, and the number of hours worked during those periods. The formulas will then use this information to calculate the difference in pay and the total retro pay owed.
Understanding Retro Pay Calculation Basics

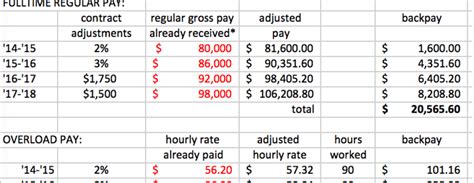
To start, it's crucial to grasp the concept of retro pay and how it's calculated. Retro pay is essentially the difference between what an employee was paid and what they should have been paid according to the new terms. This calculation can be simple for a single pay period but becomes more complex when considering multiple periods, overtime, and different pay rates for various types of work.
Setting Up the Excel Spreadsheet
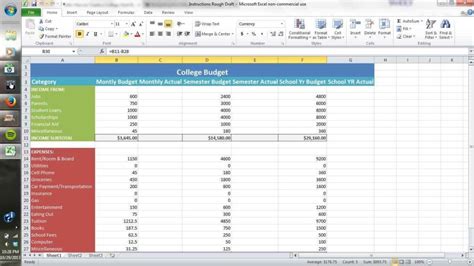
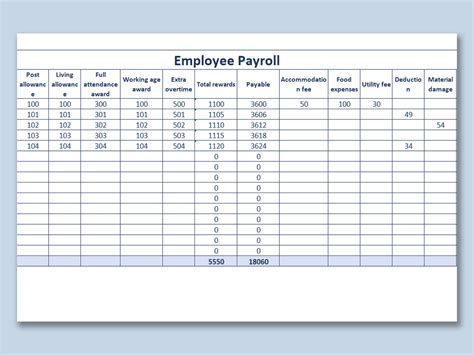
Setting up the Excel spreadsheet involves creating a structured layout where you can input the necessary data and calculate the retro pay. This includes columns for the pay period dates, original pay rate, new pay rate, hours worked, original pay, and new pay. Additional columns can be included for calculating the difference in pay for each period and the total retro pay owed.
Defining Variables and Formulas
Defining the variables and writing the formulas are crucial steps in creating the calculator. Variables might include the original pay rate, the new pay rate, and the hours worked. Formulas will calculate the original pay, the new pay based on the new rate, and the difference, which represents the retro pay for each period.
Using Excel Formulas for Retro Pay Calculation

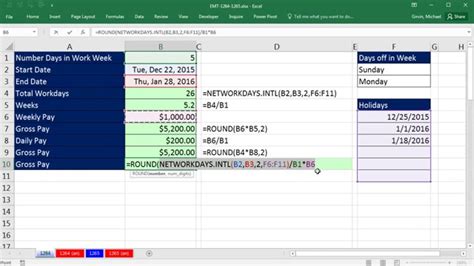
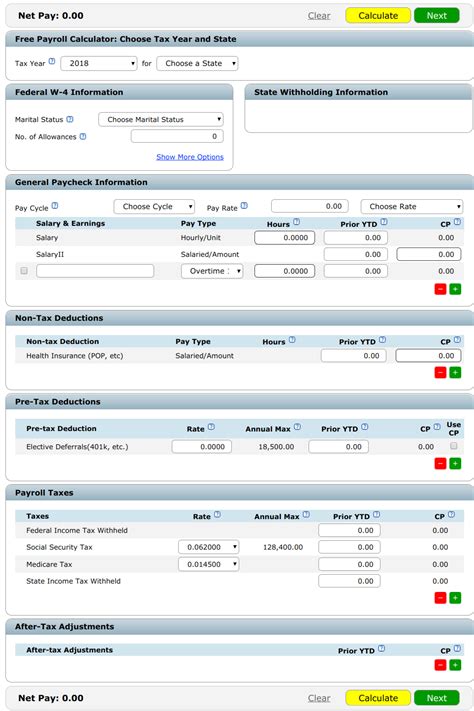
Excel formulas can automate the calculation process, making it easier to compute retro pay for multiple employees and pay periods. For instance, the formula for calculating the new pay for an employee based on a new pay rate could be =hours_worked * new_pay_rate. The retro pay for the period would then be =new_pay - original_pay.
Implementing Conditional Logic
In some cases, conditional logic may be necessary, especially if there are different rules for calculating retro pay based on certain conditions, such as the type of employment or the specific pay periods affected. Excel's IF function can be used to apply these conditions. For example, =IF(condition, value_if_true, value_if_false) can be used to check if a certain condition is met and then apply the appropriate calculation.
Creating a User-Friendly Interface

To make the retro pay calculator more accessible to users who may not be familiar with Excel, creating a user-friendly interface is important. This can involve using Excel's built-in tools such as input forms, dropdown menus, and buttons to execute macros that perform the calculations. Clear instructions and labels can also help guide the user through the process.
Testing and Validation
Before using the retro pay calculator for actual payroll adjustments, it's essential to test it with sample data to ensure that it's working correctly. This involves checking the calculations for accuracy and validating the results against manual calculations or other reliable sources.
Advanced Features and Customization

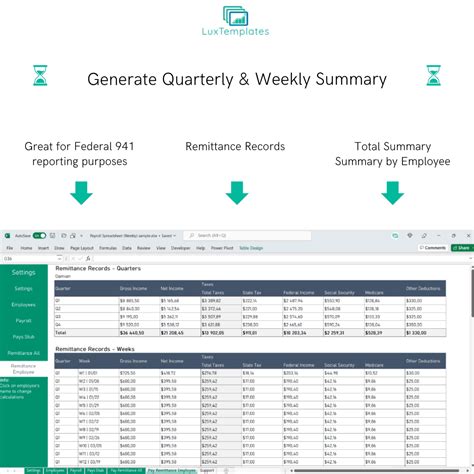
For more complex payroll scenarios, the retro pay calculator can be customized with advanced features. This might include integrating it with other payroll systems, automating the process of updating employee records, or generating reports for payroll audits. Excel's macro capabilities and its ability to connect with databases can be leveraged for these purposes.
Security and Data Protection
Given that the retro pay calculator will handle sensitive employee and payroll data, ensuring the security and integrity of this data is crucial. This involves protecting the Excel file with passwords, limiting access to authorized personnel, and following best practices for data backup and recovery.
Retro Pay Calculator Image Gallery


What is retro pay, and how is it calculated?
+Retro pay, or retroactive pay, is the difference between what an employee was paid and what they should have been paid according to new terms, such as a pay rate increase. It's calculated by determining the original pay, the new pay based on the new rate, and then finding the difference for each pay period affected.
How can I create a retro pay calculator in Excel?
+To create a retro pay calculator in Excel, set up a spreadsheet with columns for pay periods, original pay rates, new pay rates, hours worked, and original and new pay amounts. Use Excel formulas to calculate the new pay and the retro pay for each period. You can also use conditional logic and macros to automate the process and make the calculator more user-friendly.
What are some common challenges in calculating retro pay?
+Common challenges include dealing with multiple pay periods, different pay rates for various types of work, overtime, and ensuring the accuracy of the calculations. Using a structured approach and leveraging tools like Excel can help mitigate these challenges.
In conclusion, creating a retro pay calculator in Excel can be a valuable tool for managing payroll adjustments efficiently and accurately. By understanding the basics of retro pay calculation, setting up a structured spreadsheet, defining variables, and using Excel formulas, users can automate the process and reduce the risk of errors. Advanced features and customization can further enhance the calculator's functionality, making it a powerful asset for payroll management. We invite readers to share their experiences with creating retro pay calculators in Excel and any tips they might have for streamlining the process. Additionally, for those interested in exploring more payroll management tools and techniques, we encourage you to comment below with your questions or topics of interest.