Intro
Subtracting cells in a spreadsheet can be a crucial operation for various calculations, such as finding differences in values, calculating changes over time, or simply correcting previous entries. Whether you're using Google Sheets, Microsoft Excel, or another spreadsheet software, the methods to subtract cells are largely similar, with slight variations in syntax or functionality. Here, we'll explore five ways to subtract cells, making you proficient in handling basic arithmetic operations in your spreadsheets.
Subtraction in spreadsheets is fundamental and can be performed in several ways, including using formulas, the auto-sum feature, or even shortcuts. Understanding these methods not only enhances your productivity but also makes your spreadsheet work more efficient and accurate. Let's dive into the details of each method, starting with the most basic form of subtraction.
Basic Subtraction Formula
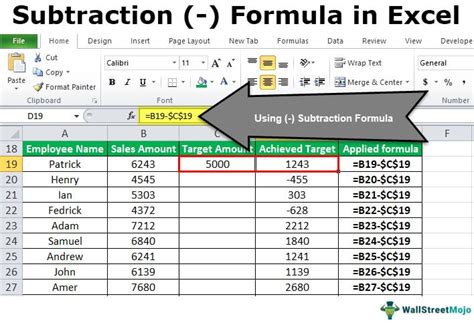
The basic subtraction formula in a spreadsheet involves using the minus sign (-) between the cells you want to subtract. For example, if you want to subtract the value in cell B2 from the value in cell A2, you would use the formula =A2-B2. This formula is simple, straightforward, and works across all spreadsheet software.
Using AutoSum for Subtraction
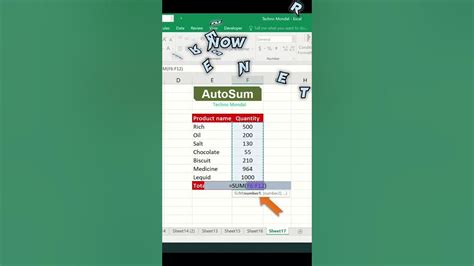
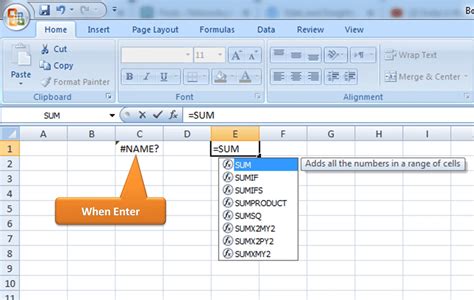
While the AutoSum feature is commonly associated with addition, it can also be adapted for subtraction by manually adjusting the formula it generates. For instance, if you want to find the total difference between two sets of numbers, you could use AutoSum to add one set and then manually adjust the formula to subtract the other set. This method is particularly useful when dealing with large datasets where manual entry of each subtraction operation would be cumbersome.
Step-by-Step AutoSum Adjustment
- Select the cell where you want to display the subtraction result.
- Go to the "Formulas" tab and click on "AutoSum."
- Choose the "Sum" option, but instead of clicking "OK," click on the formula in the formula bar to edit it.
- Adjust the formula to subtract one sum from the other. For example, if AutoSum generates =SUM(A1:A10), you could change it to =SUM(A1:A10)-SUM(B1:B10) to subtract the sum of cells B1 through B10 from the sum of cells A1 through A10.
- Press Enter to apply the formula.
Subtracting Cells Using Named Ranges
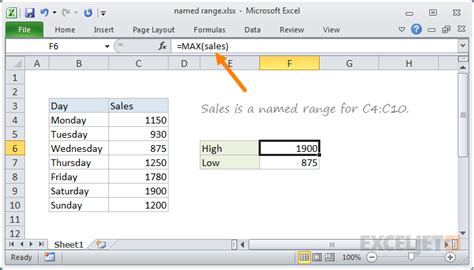
Named ranges can make your formulas more readable and easier to understand, especially in complex spreadsheets. To subtract cells using named ranges, first define the ranges you want to work with. For example, you might define "Income" for cells A1:A10 and "Expenses" for cells B1:B10. Then, you can use these named ranges in a subtraction formula like =SUM(Income)-SUM(Expenses).
Defining Named Ranges
- Select the range of cells you want to name (e.g., A1:A10).
- Click on the "Formulas" tab in the ribbon.
- Click on "Define Name" and enter a name for your range (e.g., "Income").
- Repeat the process for the other range (e.g., B1:B10), naming it "Expenses."
- Use these named ranges in your subtraction formula.
Subtracting Cells with Absolute References

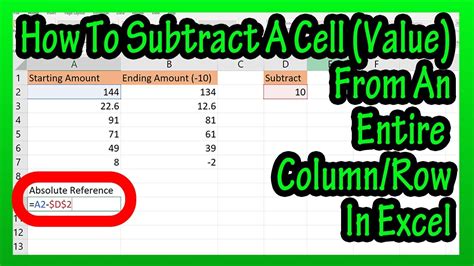
Absolute references are useful when you want to subtract a value from a cell that doesn't change, even when you copy the formula to other cells. An absolute reference is denoted by a dollar sign ($) before the column letter and row number (e.g., $A$1). For example, if you want to subtract the value in cell A1 from all cells in column B, you could use the formula =B1-$A$1 and then copy it down.
Using Absolute References in Formulas
- To make a reference absolute, press F4 while editing the formula.
- Each press of F4 cycles through different combinations of absolute and relative references (e.g., $A1, A$1, $A$1).
Subtracting Cells Using Shortcuts
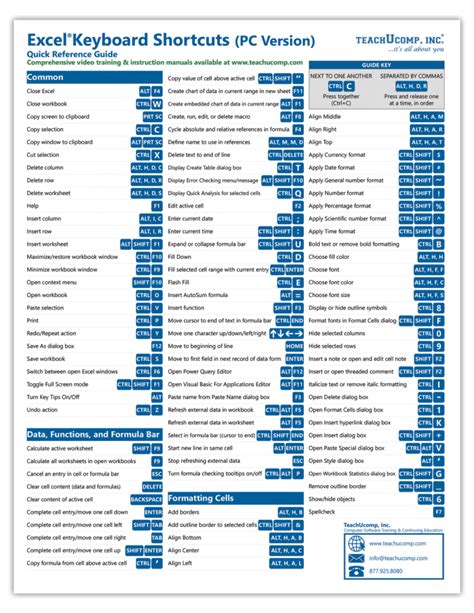
Keyboard shortcuts can significantly speed up your work in spreadsheets. While there isn't a direct shortcut for subtraction, you can use the formula bar shortcuts to quickly enter and edit formulas. For example, pressing "=" starts a formula, and then you can type the cells you want to subtract. Using shortcuts like Ctrl+Enter to accept a formula and move to the next cell, or Ctrl+C and Ctrl+V to copy and paste, can streamline your workflow.
Essential Shortcuts for Spreadsheet Work
- "=": Starts a formula.
- Ctrl+Enter: Accepts a formula and keeps the cell selected.
- Ctrl+C: Copies the selected cell(s).
- Ctrl+V: Pastes the copied cell(s).
- F4: Toggles absolute and relative references.
Subtraction in Spreadsheets Image Gallery


What is the basic formula for subtracting cells in a spreadsheet?
+The basic formula for subtracting cells in a spreadsheet is =A1-B1, where A1 is the cell containing the number you want to subtract from, and B1 is the cell containing the number you want to subtract.
How do I use AutoSum for subtraction in a spreadsheet?
+To use AutoSum for subtraction, first, use AutoSum to sum the cells you want, then manually adjust the formula to subtract another sum or value. For example, if AutoSum generates =SUM(A1:A10), you could change it to =SUM(A1:A10)-SUM(B1:B10) to subtract the sum of cells B1 through B10 from the sum of cells A1 through A10.
What are named ranges, and how can they be used for subtraction in spreadsheets?
+Named ranges are labels given to a cell or range of cells in a spreadsheet, making formulas more readable. To use named ranges for subtraction, define the ranges (e.g., "Income" for A1:A10 and "Expenses" for B1:B10), then use these names in your subtraction formula, such as =SUM(Income)-SUM(Expenses).
In conclusion, mastering the art of subtracting cells in a spreadsheet is essential for anyone working with data, whether for personal finance, business operations, or academic research. By understanding and applying the methods outlined above, you can efficiently perform subtraction operations, making your work more accurate and your spreadsheets more effective. Remember, practice makes perfect, so don't hesitate to experiment with these techniques in your own spreadsheet projects. Share your experiences or ask questions in the comments below, and don't forget to share this article with anyone who might benefit from learning more about spreadsheet subtraction methods.