Intro
Discover the 5 Ways Excel Curve helps with data analysis, forecasting, and visualization, using nonlinear regression, trend analysis, and curve fitting techniques.
The importance of understanding and working with curves in Excel cannot be overstated, especially for professionals and students alike who deal with data analysis and visualization. Excel, being a powerful spreadsheet program, offers a variety of tools and functions to handle curves, from simple linear regressions to complex nonlinear curves. Mastering these tools can significantly enhance one's ability to analyze, interpret, and present data. Whether it's for predicting trends, understanding relationships between variables, or simply making data more engaging and understandable, curves play a pivotal role. This article aims to delve into the world of curves in Excel, exploring the different types, their applications, and how to work with them effectively.
The application of curves in Excel is vast and varied, ranging from financial analysis to scientific research. For instance, in finance, curves can be used to model the yield of bonds or to forecast stock prices based on historical trends. In scientific research, curves can help in understanding the growth patterns of organisms, the spread of diseases, or the behavior of physical systems over time. The flexibility and power of Excel in handling such analyses make it an indispensable tool for professionals and researchers. Moreover, with the increasing availability of data, the ability to analyze and present findings in a clear, concise manner has become more crucial than ever.
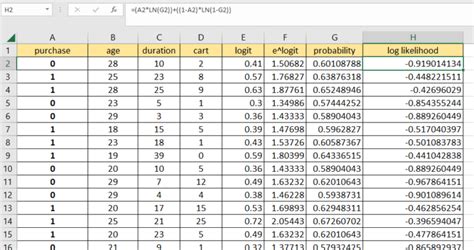
Understanding how to work with curves in Excel begins with grasping the basic concepts of data analysis and visualization. This includes knowing how to input and organize data, how to select the appropriate type of curve for the data at hand, and how to interpret the results. Excel provides several built-in functions and tools, such as the Scatter plot and the Trendline feature, which can be used to create and analyze curves. Additionally, understanding statistical concepts like regression analysis, which is the process of establishing a relationship between two variables, is essential for working effectively with curves.
Introduction to Excel Curves
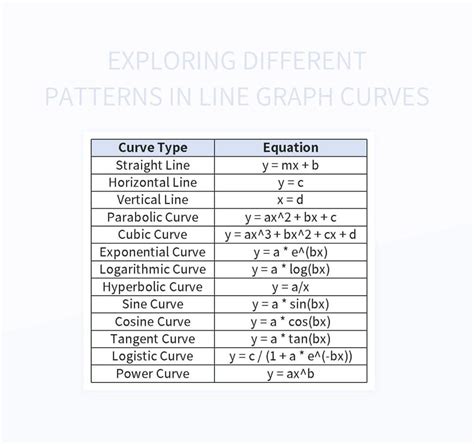
Excel curves are graphical representations that show the relationship between two variables. These can range from simple linear relationships to more complex polynomial or exponential relationships. The choice of curve depends on the nature of the data and the type of analysis being performed. For example, a linear curve might be appropriate for showing a direct relationship between two variables, while a nonlinear curve might better represent more complex relationships, such as the growth of a population over time.
Types of Curves in Excel
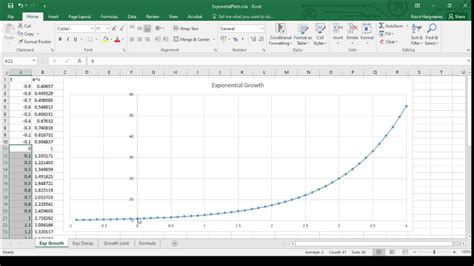
There are several types of curves that can be created in Excel, each suited to different types of data and analyses. These include: - Linear curves, which represent a straight-line relationship between variables. - Polynomial curves, which can model more complex relationships and are especially useful when the relationship between variables is not linear. - Exponential curves, often used to model growth or decay over time, such as population growth or chemical reactions. - Logistic curves, which are useful for modeling phenomena that grow rapidly at first but then level off, such as the spread of a disease or the adoption of a new technology.Working with Curves in Excel

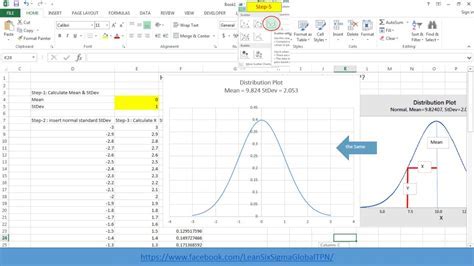
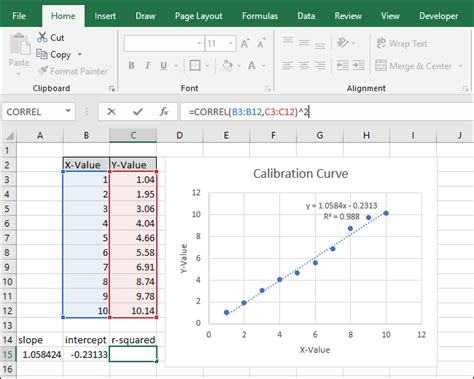
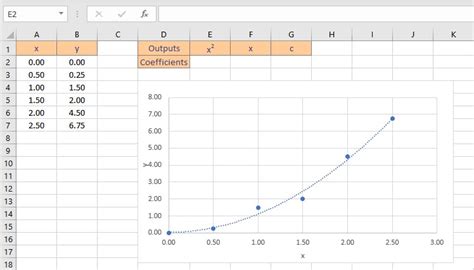
To work with curves in Excel, one must first prepare the data. This involves organizing the data into two columns, one for each variable. The next step is to create a Scatter plot, which can be done by selecting the data range and using the Chart Wizard or the Insert Chart button. Once the Scatter plot is created, Excel's Trendline feature can be used to add a curve that best fits the data. The type of Trendline (linear, polynomial, exponential, etc.) can be selected based on the nature of the relationship being modeled.
Steps to Create a Curve in Excel
Creating a curve in Excel involves the following steps: 1. **Prepare the Data**: Ensure the data is organized into two columns. 2. **Create a Scatter Plot**: Use the Insert Chart button to create a Scatter plot. 3. **Add a Trendline**: Right-click on the data series in the chart and select "Add Trendline". 4. **Choose the Trendline Type**: Select the type of curve that best fits the data. 5. **Customize the Trendline**: Options such as the degree of the polynomial or the display of the equation on the chart can be customized.Benefits of Using Curves in Excel
The use of curves in Excel offers several benefits, including:
- Improved Data Visualization: Curves can make complex data easier to understand by visually representing trends and relationships.
- Enhanced Analysis: By fitting curves to data, one can model and predict the behavior of systems, making it easier to forecast future trends.
- Better Decision Making: With a clearer understanding of the relationships between variables, better-informed decisions can be made.
Common Applications of Curves in Excel
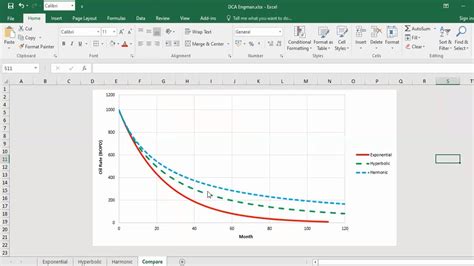
Curves in Excel have a wide range of applications, including: - **Financial Analysis**: For forecasting stock prices, modeling investment returns, and analyzing market trends. - **Scientific Research**: For understanding the behavior of physical systems, modeling population growth, and analyzing experimental data. - **Business Planning**: For forecasting sales, understanding customer behavior, and modeling business growth.Advanced Curve Analysis in Excel
For more advanced analysis, Excel offers additional tools and features, such as:
- Nonlinear Regression: For modeling complex relationships that cannot be adequately represented by linear or simple polynomial curves.
- Monte Carlo Simulations: For analyzing the behavior of systems under uncertainty and for forecasting future outcomes.
- Dynamic Charts: For creating interactive charts that can be used to explore how changes in one variable affect others.
Challenges and Limitations
While curves are a powerful tool in Excel, there are challenges and limitations to their use, including: - **Data Quality**: The accuracy of the curve is only as good as the data it is based on. Poor data quality can lead to misleading results. - **Overfitting**: Choosing a curve that is too complex can result in overfitting, where the curve matches the noise in the data rather than the underlying pattern. - **Interpretation**: Understanding and correctly interpreting the results of curve analysis requires a good grasp of statistical concepts and the context of the data.Gallery of Excel Curve Examples
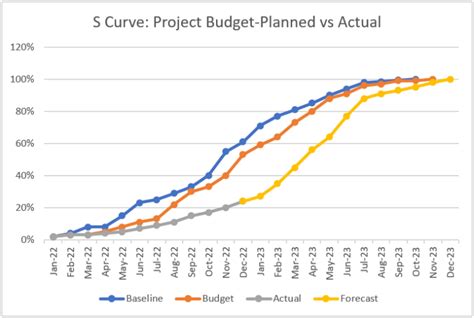
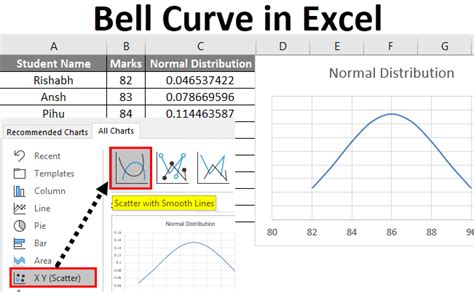
Excel Curve Examples

Frequently Asked Questions
What is the purpose of using curves in Excel?
+The purpose of using curves in Excel is to visually represent the relationship between two variables, making it easier to analyze, understand, and predict trends and patterns in data.
How do I choose the right type of curve for my data?
+The choice of curve depends on the nature of the relationship between the variables. For example, a linear curve is appropriate for direct relationships, while a nonlinear curve might be better for more complex relationships.
Can I use curves in Excel for forecasting?
+Yes, curves in Excel can be used for forecasting by extending the curve beyond the existing data points to predict future values.
In conclusion, curves in Excel are a powerful tool for data analysis and visualization, offering a wide range of applications from financial forecasting to scientific research. By understanding the different types of curves, how to create them, and how to interpret the results, users can unlock deeper insights into their data and make more informed decisions. Whether you're a seasoned professional or just starting out with Excel, mastering the art of working with curves can significantly enhance your data analysis capabilities. We invite you to share your experiences, ask questions, or explore further the vast potential of curves in Excel.