Intro
Discover 5 ways to create Excel Yes No drop downs, enhancing data validation with conditional formatting, formulas, and pivot tables for efficient data analysis and visualization.
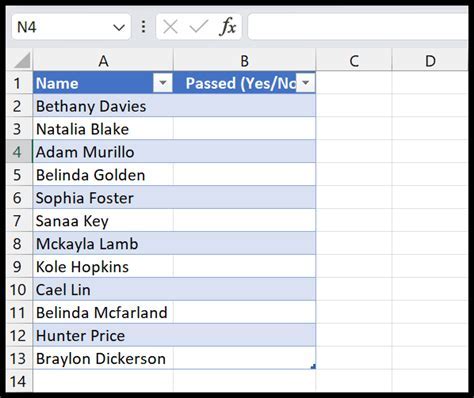
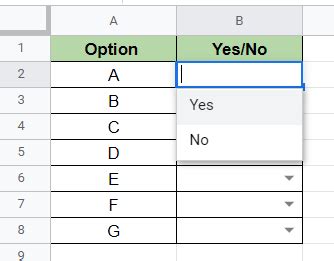
Creating a yes or no drop-down list in Excel can be incredibly useful for organizing and analyzing data, especially in surveys, inventory management, and decision-making processes. This feature allows users to restrict input to only two options: "Yes" and "No," reducing errors and making data analysis more efficient. Here's how you can create a yes or no drop-down list in Excel, along with some practical applications and variations.
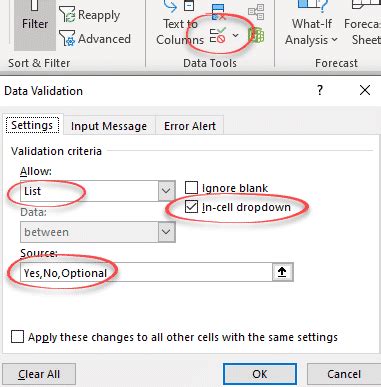
First, understanding the importance of data validation in Excel is crucial. Data validation is a feature that controls what a user can enter into a cell. By using data validation, you can create drop-down lists, limit input to certain formats or ranges, and even apply specific criteria to the data entered. For a yes or no drop-down, you will primarily use the "List" option within the data validation feature.
To start, let's delve into the basic steps for creating a simple yes or no drop-down list.
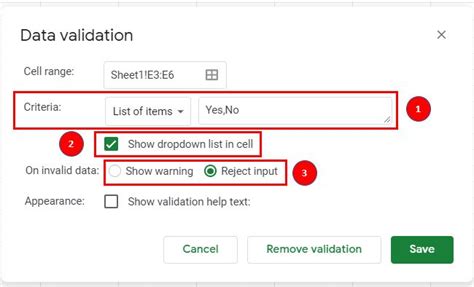
Basic Steps for Creating a Yes No Drop Down
- Select the Cell: Choose the cell where you want the drop-down list to appear.
- Go to Data Tab: Navigate to the "Data" tab in the Excel ribbon.
- Data Validation: Click on "Data Validation" in the Data Tools group.
- Settings: In the Data Validation dialog box, under the "Settings" tab, click on the "Allow" dropdown menu and select "List".
- Source: In the "Source" field, you can either directly type
="Yes","No"(including the quotes and comma) or reference a range that contains "Yes" and "No". - Apply: Click "OK" to apply the changes.

Using a Range for Yes No Options
Instead of directly typing "Yes" and "No" into the source field, you can also use a range of cells that contain these options. This method is particularly useful if you plan to use the same list in multiple places or if you need to easily change the options.
- Type "Yes" and "No": In two separate cells (for example, A1 and A2), type "Yes" and "No".
- Select the Cell for the Drop Down: Choose the cell where you want the drop-down list to appear.
- Data Validation: Follow the same steps as before to open the Data Validation dialog box.
- Reference the Range: In the "Source" field, select the range that contains "Yes" and "No" (e.g.,
$A$1:$A$2). - Apply: Click "OK".

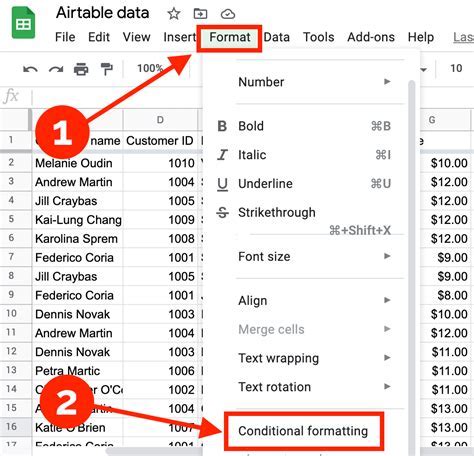
Applying Conditional Formatting Based on Yes No
Conditional formatting can enhance your spreadsheet by visually highlighting cells based on specific conditions. For a yes or no drop-down, you might want to change the cell's background color or font color based on the selection.
- Select the Cell: Choose the cell with the yes or no drop-down.
- Conditional Formatting: Go to the "Home" tab, find the "Styles" group, and click on "Conditional Formatting".
- New Rule: Select "New Rule" and choose "Use a formula to determine which cells to format".
- Formula: For "Yes", you might use
=A1="Yes"(assuming the drop-down is in cell A1), and for "No",=A1="No". - Format: Click the "Format" button to choose how you want the cell to appear when the condition is met.
- Apply: Click "OK" to apply the rule.
Using Yes No Drop Down in Formulas
Yes or no drop-downs can also be used within formulas to make decisions based on the user's selection. For example, you can use the IF function to return a specific value if the selection is "Yes" or another value if it's "No".
- Formula: Use a formula like
=IF(A1="Yes", "Action Required", "No Action"), where A1 is the cell with the drop-down.
Protecting the Yes No Drop Down
To prevent users from modifying the drop-down list or entering values not in the list, you can protect the worksheet.
- Review Tab: Go to the "Review" tab.
- Protect Sheet: Click on "Protect Sheet" in the "Protect" group.
- Password: Enter a password to unlock the sheet for editing.
- Allow Users to Select: Under "Allow users of this worksheet to:", check "Select unlocked cells" and any other permissions you wish to grant.

Variations and Advanced Uses
- Dynamic Lists: You can create dynamic yes or no lists that update automatically based on changes in a range.
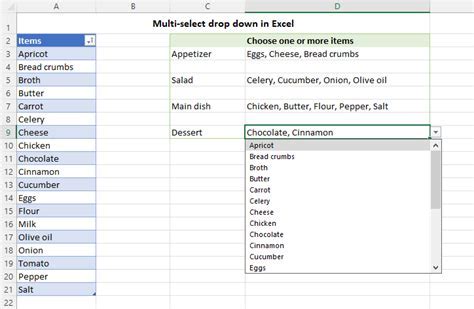
- Multiple Selections: While the standard drop-down allows only one selection, you can use checkboxes or other methods for multiple selections.
- Dependent Drop-Downs: Create drop-downs where the options change based on the selection in another cell.
Gallery of Yes No Drop Down Examples
Yes No Drop Down Image Gallery


How do I create a yes or no drop-down list in Excel?
+To create a yes or no drop-down list, select the cell where you want the list, go to the Data tab, click on Data Validation, select List under Allow, and then type "Yes" and "No" in the source field or reference a range containing these values.
Can I use conditional formatting with yes or no drop-downs?
+Yes, you can apply conditional formatting to cells with yes or no drop-downs. This can help visually distinguish between "Yes" and "No" selections by changing the cell's background color, font color, etc.
How can I protect my yes or no drop-down list from being modified by users?
+You can protect your worksheet by going to the Review tab, clicking on Protect Sheet, and setting a password. This will prevent users from modifying the drop-down list or entering values not in the list.
In conclusion, incorporating yes or no drop-down lists into your Excel spreadsheets can significantly enhance data entry efficiency and accuracy. By following the steps outlined above, you can easily create and customize these lists to fit your specific needs. Whether you're managing surveys, tracking inventory, or making decisions based on user input, yes or no drop-downs are a versatile tool that can streamline your workflow. Feel free to share your experiences or ask questions about using yes or no drop-downs in Excel in the comments below.