Intro
Master Excel Group Date Pivot Filter to analyze data by date ranges, using pivot tables, date grouping, and filters for efficient data insights and reporting.
The ability to efficiently analyze and summarize large datasets is crucial in today's data-driven world. One of the most powerful tools for achieving this in Microsoft Excel is the PivotTable. When working with date fields in PivotTables, being able to group dates and apply filters is essential for gaining insights into trends and patterns over time. In this article, we will delve into the specifics of how to group dates in a PivotTable and apply filters to narrow down your analysis to the most relevant data.
Excel's PivotTable feature allows users to rotate, aggregate, and disaggregate data, making it easier to analyze and understand large datasets. When dealing with dates, PivotTables can automatically group them into years, quarters, months, weeks, and even days, depending on the level of granularity needed for the analysis. This grouping capability is particularly useful for identifying seasonal trends, patterns over time, and for comparing performance across different periods.
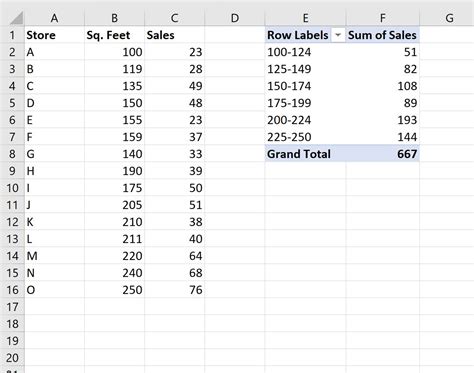
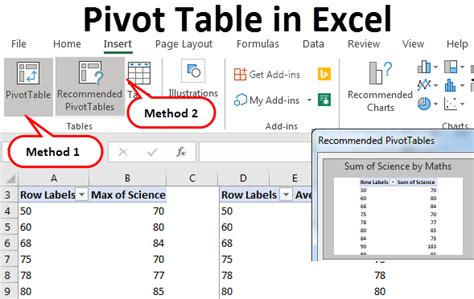
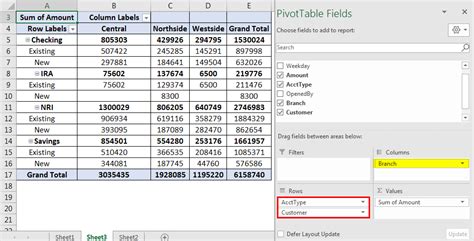
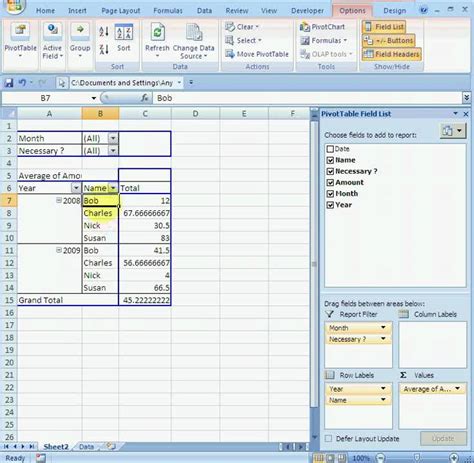
To start working with dates in a PivotTable, you first need to create a PivotTable from your dataset. Select the range of cells that contains your data, go to the "Insert" tab on the ribbon, and click on "PivotTable." Choose a cell where you want the PivotTable to be placed and click "OK." Once the PivotTable is created, you can add your date field to the "Row Labels" area of the PivotTable Fields pane. This will display each unique date in your dataset as a separate row in the PivotTable.
However, having each date as a separate row can make the PivotTable cumbersome to work with, especially if you have a large dataset that spans several months or years. This is where grouping dates comes into play. To group dates in a PivotTable, follow these steps:
- Select the Date Field: Click on the row label that represents your date field in the PivotTable.
- Right-Click and Group: Right-click on the selected row label and choose "Group" from the context menu.
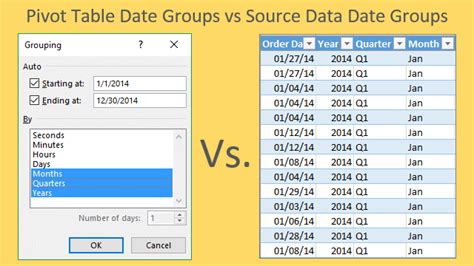
- Select Grouping Interval: In the "Grouping" dialog box, select the desired grouping interval (e.g., months, quarters, years). You can also specify a custom grouping interval if needed.
- Apply the Grouping: Click "OK" to apply the grouping. Your dates will now be grouped according to the interval you selected.
After grouping your dates, you may want to apply filters to focus on specific periods or to exclude certain dates from your analysis. Excel provides several ways to filter dates in a PivotTable, including using the "Date Filters" option in the PivotTable Fields pane or applying a filter directly to the grouped date field.
To apply a date filter, follow these steps:
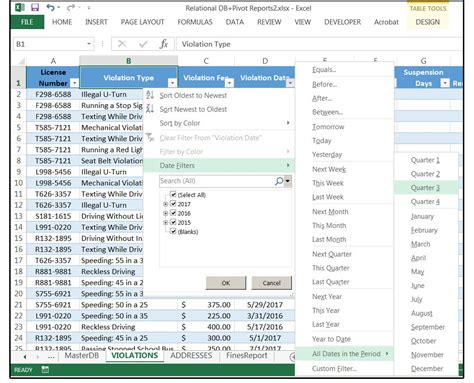
- Select the Filter Option: Go to the PivotTable Fields pane, click on the dropdown arrow next to the date field in the "Row Labels" area, and select "Date Filters."
- Choose a Filter Option: Select the desired filter option, such as "All Dates in Period," "Before," "After," "Between," etc.
- Specify the Filter Criteria: Depending on the filter option you chose, you will need to specify the criteria for the filter, such as selecting a specific period or entering a date range.
- Apply the Filter: Click "OK" to apply the filter. The PivotTable will now only display data for the dates that meet the filter criteria.

In addition to grouping and filtering, PivotTables offer a range of other features that can enhance your date-based analysis, such as:
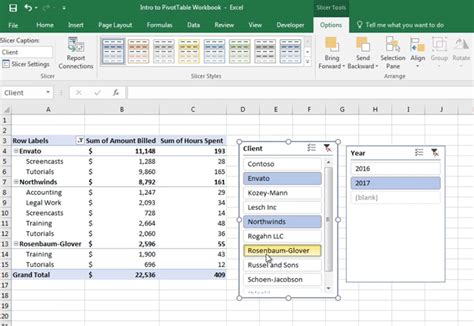
- Slicers: These are interactive filters that can be used to filter data in a PivotTable. Slicers are particularly useful for date fields, as they allow you to easily select a specific date range or period.
- Timelines: Excel's timeline feature allows you to create a dynamic filter that can be used to select a range of dates. Timelines are especially useful for analyzing data over time, as they provide a visual representation of the date range.
- Calculated Fields: If you need to perform calculations that involve dates, such as calculating the difference between two dates or determining if a date falls within a certain range, you can use calculated fields in your PivotTable.
Benefits of Using PivotTables for Date Analysis
Using PivotTables for date analysis offers several benefits, including:
- Flexibility: PivotTables allow you to easily change the level of detail in your analysis, from high-level summaries to detailed breakdowns.
- Efficiency: PivotTables can significantly reduce the time it takes to analyze large datasets, especially when working with dates.
- Insight: By grouping and filtering dates, PivotTables can help you identify trends and patterns that might not be immediately apparent from looking at raw data.

Common Challenges and Solutions
When working with dates in PivotTables, you may encounter several challenges, such as:
- Inconsistent Date Formats: If your dataset contains dates in different formats, it can cause issues when trying to group or filter them. Solution: Ensure all dates are in a consistent format before creating the PivotTable.
- Missing Dates: If there are gaps in your date range, it can affect the accuracy of your analysis. Solution: Use the "Group" feature to include missing dates or use a date table to fill in gaps.

Best Practices for Working with Dates in PivotTables
To get the most out of using PivotTables for date analysis, follow these best practices:
- Use a Consistent Date Format: Ensure all dates in your dataset are in the same format to avoid issues with grouping and filtering.
- Use the "Group" Feature Wisely: Grouping dates can significantly enhance your analysis, but be mindful of the level of granularity you need.
- Regularly Update Your Data: Keep your dataset up to date to ensure your analysis reflects the latest trends and patterns.

Advanced Techniques for Date Analysis
For more advanced users, Excel offers several techniques for enhancing date analysis in PivotTables, including:
- Using Power Query: Power Query can be used to preprocess your data, including handling date fields, before creating a PivotTable.
- Creating Custom Date Tables: Custom date tables can provide more flexibility and control over date-based analysis.

PivotTable Date Analysis Image Gallery


How do I group dates in a PivotTable?
+To group dates in a PivotTable, right-click on the date field in the "Row Labels" area, select "Group," and then choose the desired grouping interval (e.g., months, quarters, years).
Can I apply filters to grouped dates in a PivotTable?
+Yes, you can apply filters to grouped dates in a PivotTable. Use the "Date Filters" option in the PivotTable Fields pane or apply a filter directly to the grouped date field.
How do I ensure consistent date formats in my dataset?
+Ensure all dates in your dataset are in the same format before creating the PivotTable. You can use Excel's date formatting tools to achieve this consistency.
In conclusion, mastering the art of grouping dates and applying filters in Excel PivotTables can significantly enhance your data analysis capabilities. By following the steps and best practices outlined in this article, you can unlock deeper insights into your data and make more informed decisions. Whether you're a seasoned Excel user or just starting out, the power of PivotTables awaits. Share your experiences and tips for working with dates in PivotTables in the comments below, and don't forget to share this article with anyone who could benefit from improving their Excel skills.