Intro
Unlock data insights with 5 ways to normalize plots in Excel, enhancing chart readability and visualization using scaling, formatting, and axis adjustments for effective data analysis and presentation.
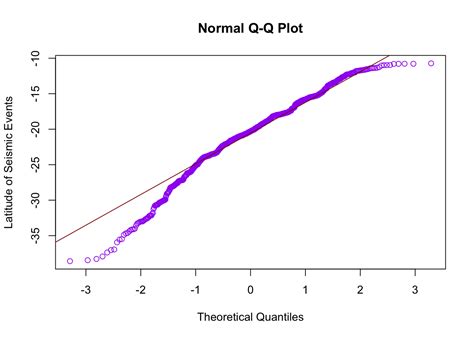
Creating a normal plot, also known as a normal probability plot or Q-Q plot, in Excel is a useful tool for determining whether a dataset follows a normal distribution. This can be crucial in statistical analysis, as many statistical tests assume normality. While Excel does not have a built-in function for creating Q-Q plots directly, you can achieve this through a few different methods. Here, we'll explore five ways to create a normal plot in Excel, each with its own advantages and requirements.
The importance of normal plots cannot be overstated. They provide a visual means to assess the normality of data, which is essential for selecting the appropriate statistical tests and ensuring the validity of the results. Normal plots can help identify outliers, skewness, and other deviations from normality, guiding the choice of statistical methods and the interpretation of data.
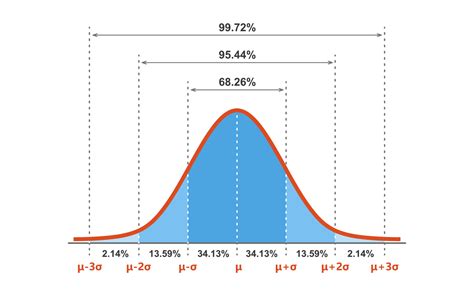
To begin with, it's essential to understand what a normal distribution is and why it's significant in statistical analysis. A normal distribution, often referred to as a bell curve, is a probability distribution that is symmetric about the mean, indicating that data near the mean are more frequent in occurrence than data far from the mean. In many natural phenomena, data follow a normal distribution, making it a cornerstone of statistical inference.
Understanding Normal Distribution

A normal distribution is characterized by its mean (μ) and standard deviation (σ), which determine the center and the spread of the distribution, respectively. The standard normal distribution, with a mean of 0 and a standard deviation of 1, is particularly useful for comparing different datasets.
Method 1: Using Excel's Built-in Functions

One of the simplest methods to create a normal plot in Excel involves using the built-in functions such as AVERAGE, STDEV, and NORM.S.INV to calculate the mean, standard deviation, and the inverse of the standard normal distribution for each data point, respectively. Here’s a step-by-step guide:
- Calculate the mean and standard deviation of your dataset.
- Rank your data from smallest to largest.
- Use the formula
NORM.S.INV((rank-0.5)/n)to calculate the expected normal values, whererankis the rank of the data point andnis the total number of data points. - Plot the actual data points against the expected normal values.
Calculating Mean and Standard Deviation
Calculating the mean and standard deviation is straightforward in Excel. You can use the `AVERAGE` function for the mean and the `STDEV` function for the standard deviation. For example, if your data is in cells A1:A100, the mean would be calculated as `=AVERAGE(A1:A100)` and the standard deviation as `=STDEV(A1:A100)`.Method 2: Utilizing Excel Add-ins

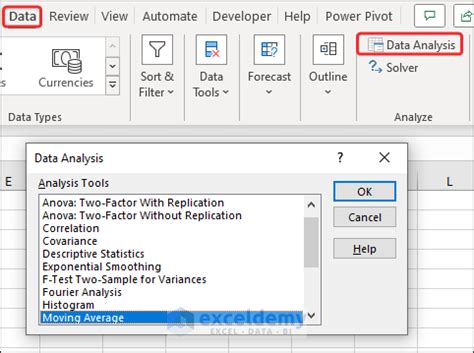
Excel add-ins like Analysis ToolPak (ATP) can provide more advanced statistical functions, including the ability to create normal plots. ATP offers a range of tools for statistical analysis, including descriptive statistics, inference, and modeling. To create a normal plot using ATP:
- Ensure ATP is installed and enabled in your Excel.
- Go to the "Data" tab, click on "Data Analysis," and select "Regression" or the appropriate statistical tool for your needs.
- Although ATP does not directly offer a Q-Q plot, you can use its regression analysis to assess normality of residuals.
Enabling Analysis ToolPak
To enable ATP, go to the "File" tab, click on "Options," then "Add-ins," and finally check the box next to "Analysis ToolPak" and click "OK." If ATP is not listed, you may need to browse to the "Manage: Excel Add-ins" section and check the box there.Method 3: Creating a Scatter Plot
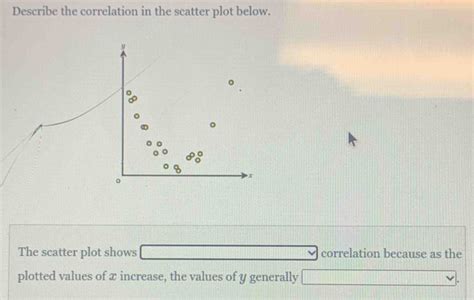
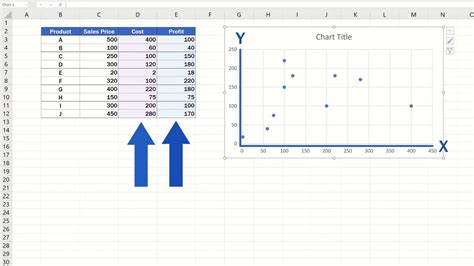
A more direct approach to visualizing normality involves creating a scatter plot of your data against the expected values from a normal distribution. This method is similar to the first but focuses on the visual representation:
- Calculate the expected normal values as described in Method 1.
- Select both your actual data and the expected normal values.
- Go to the "Insert" tab and choose "Scatter" to create a scatter plot.
Customizing Your Scatter Plot
You can customize your scatter plot by adding titles, labels, and a trendline. Right-click on the plot area to access these options. Adding a linear trendline can help visually assess how closely your data follows a normal distribution.Method 4: Using VBA Macros
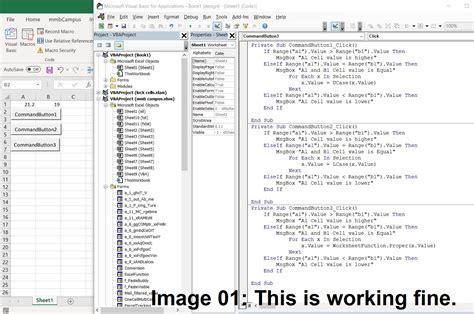
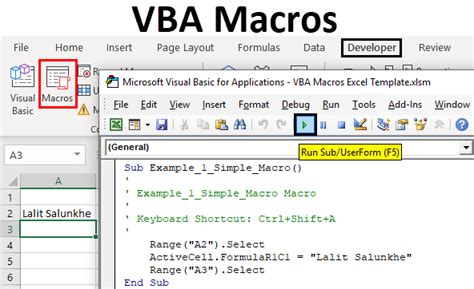
For those comfortable with programming, VBA (Visual Basic for Applications) macros can automate the process of creating normal plots. You can write a macro to calculate the necessary values and create the plot:
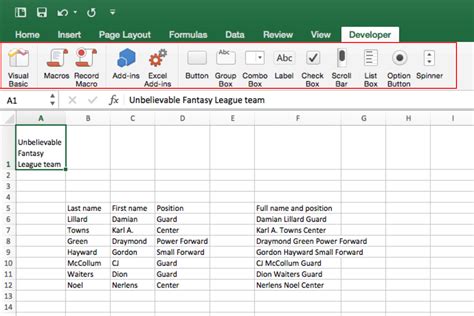
- Open the Visual Basic Editor by pressing "Alt + F11" or navigating to the "Developer" tab.
- Insert a new module and write your macro, using Excel’s object model to interact with worksheets and charts.
Example VBA Macro
An example macro might loop through each data point, calculate the expected normal value, and then plot these values. However, writing such a macro requires familiarity with VBA and is more complex than the other methods described.Method 5: External Software and Add-ins

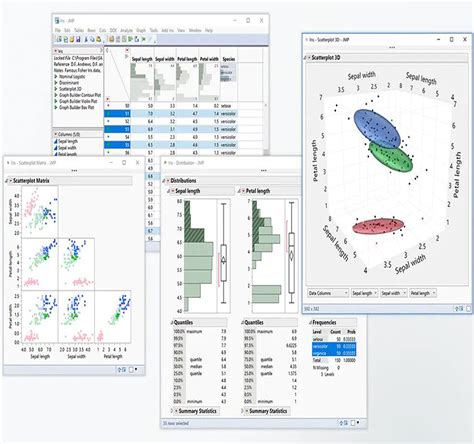
Finally, there are external software programs and Excel add-ins specifically designed for statistical analysis that can create normal plots with ease. Software like Minitab, JMP, or add-ins like SigmaXL offer powerful statistical tools, including normality tests and plots:
- Import your data into the chosen software or add-in.
- Follow the software’s instructions for creating a normal plot or performing a normality test.
Choosing the Right Software
The choice of software depends on your specific needs, the complexity of your data, and your familiarity with statistical software. Some programs are more user-friendly and offer a wider range of tools, while others are more specialized.Normal Plot Image Gallery

What is a normal plot used for?
+A normal plot, or Q-Q plot, is used to determine if a dataset follows a normal distribution. It's a graphical method to compare the distribution of your data with a normal distribution, helping in identifying outliers, skewness, and assessing the appropriateness of statistical tests that assume normality.
How do I interpret a normal plot?
+Interpreting a normal plot involves looking at how closely the data points follow a straight line. If the points lie close to the line, it suggests that the data follows a normal distribution. Deviations from the line, especially at the extremes (tails), can indicate non-normality. Outliers will appear as points that are far away from the line.
Can I use Excel for complex statistical analysis?
+While Excel is incredibly powerful and can handle a wide range of statistical tasks, including regression, hypothesis testing, and data visualization, it might not be the best choice for very complex statistical analysis. For such cases, specialized statistical software like R, Python libraries (e.g., Pandas, NumPy), or dedicated programs like SPSS or SAS might be more appropriate.
In conclusion, creating a normal plot in Excel can be achieved through various methods, each with its own set of advantages and requirements. Whether you choose to use built-in functions, add-ins, external software, or VBA macros, the key is to select the method that best fits your needs and skill level. Remember, understanding and interpreting normal plots is crucial for making informed decisions in statistical analysis. We invite you to share your experiences with creating normal plots in Excel and any tips you might have for our readers. Feel free to comment below or share this article with others who might find it useful.