Intro
Learn to create 3D graphs in Excel with ease. Master data visualization using 3D charts, plots, and Excel templates for interactive reports and presentations.
Creating 3D graphs in Excel can be a powerful way to visualize complex data and make it more engaging for your audience. With the help of Excel's built-in tools and features, you can create stunning 3D graphs that help to convey your message more effectively. In this article, we will explore the steps to create a 3D graph in Excel and provide you with some tips and tricks to make your graphs more informative and visually appealing.
To start creating a 3D graph in Excel, you need to have a dataset that you want to visualize. This dataset can be in the form of a table or a range of cells that contain numerical data. Once you have your dataset ready, you can follow these steps to create a 3D graph in Excel.
Step 1: Prepare Your Data
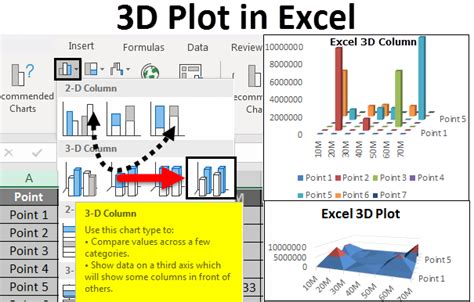
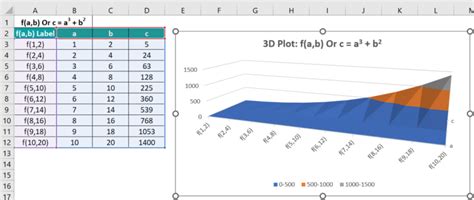
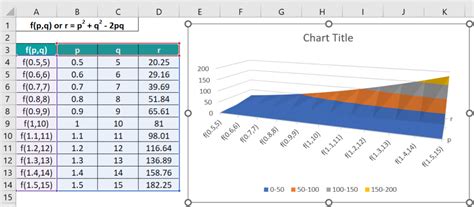
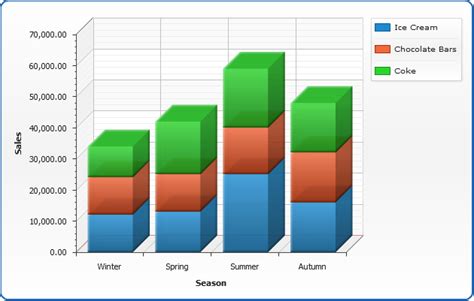
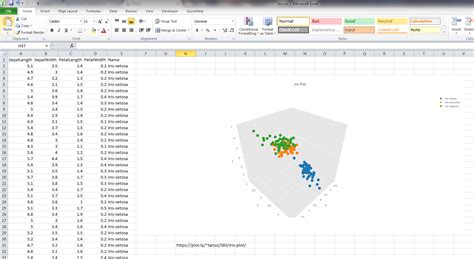
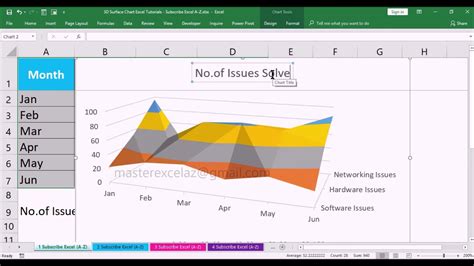
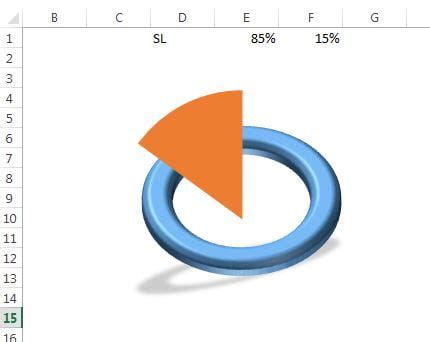
Step 2: Choose a 3D Graph Type
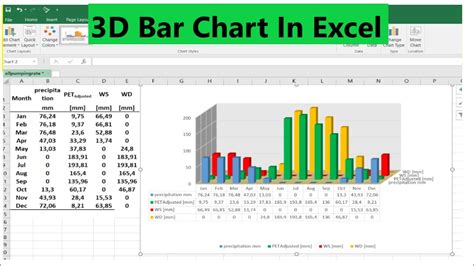
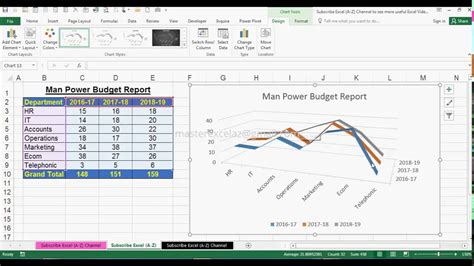
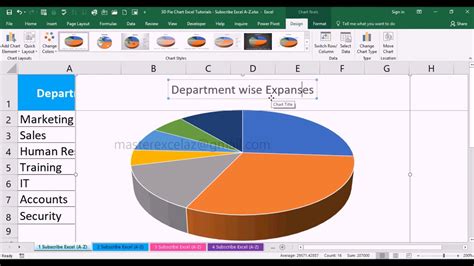
Step 3: Create a 3D Graph
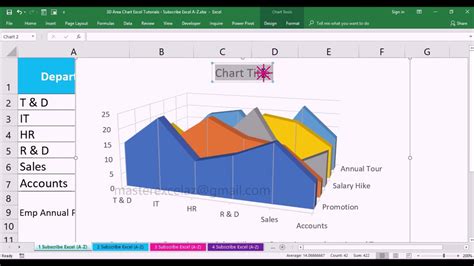
Customizing Your 3D Graph
Once you have created a 3D graph in Excel, you can customize it to make it more informative and visually appealing. You can add titles, labels, and legends to your graph, and change the colors and fonts to match your brand or style. You can also use Excel's built-in tools and features to rotate, resize, and animate your graph.Benefits of Using 3D Graphs in Excel

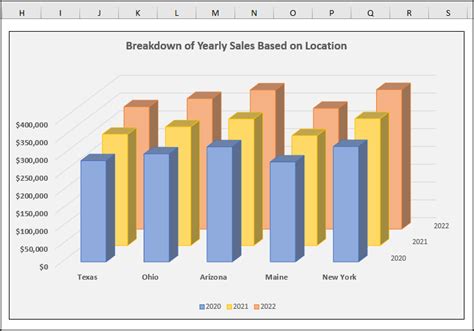
Common Applications of 3D Graphs in Excel
Tips and Tricks for Creating Effective 3D Graphs
To create effective 3D graphs in Excel, you can follow these tips and tricks: * Keep it simple: Avoid using too many colors, fonts, and labels, as this can make your graph look cluttered and confusing. * Use clear and concise labels: Make sure that your labels are clear and concise, and that they provide enough information to understand the graph. * Experiment with different graph types: Don't be afraid to try out different graph types and see which one works best for your data.Gallery of 3D Graphs in Excel
3D Graphs in Excel Image Gallery
What is a 3D graph in Excel?
+A 3D graph in Excel is a type of chart that uses three dimensions to display data. It can be used to visualize complex data in a more intuitive and engaging way.
How do I create a 3D graph in Excel?
+To create a 3D graph in Excel, you can use the "Insert" tab and click on the "Chart" button. This will open a dialog box where you can choose a chart type and select the data range that you want to use for your graph.
What are the benefits of using 3D graphs in Excel?
+The benefits of using 3D graphs in Excel include improved visualization, enhanced storytelling, and increased engagement. 3D graphs can help to convey complex data in a more intuitive and engaging way, making it easier to understand and analyze.
In conclusion, creating 3D graphs in Excel can be a powerful way to visualize complex data and make it more engaging for your audience. By following the steps outlined in this article, you can create stunning 3D graphs that help to convey your message more effectively. Whether you're using 3D graphs for business, education, or research, they can be a valuable tool for communicating complex data in a more intuitive and engaging way. So why not give it a try and see how 3D graphs can help you to tell a more compelling story with your data? Share your thoughts and experiences with 3D graphs in the comments below, and don't forget to share this article with your friends and colleagues who may be interested in learning more about creating 3D graphs in Excel.